
Integrating with Lever
This guide covers:
Connecting Lever to Pin
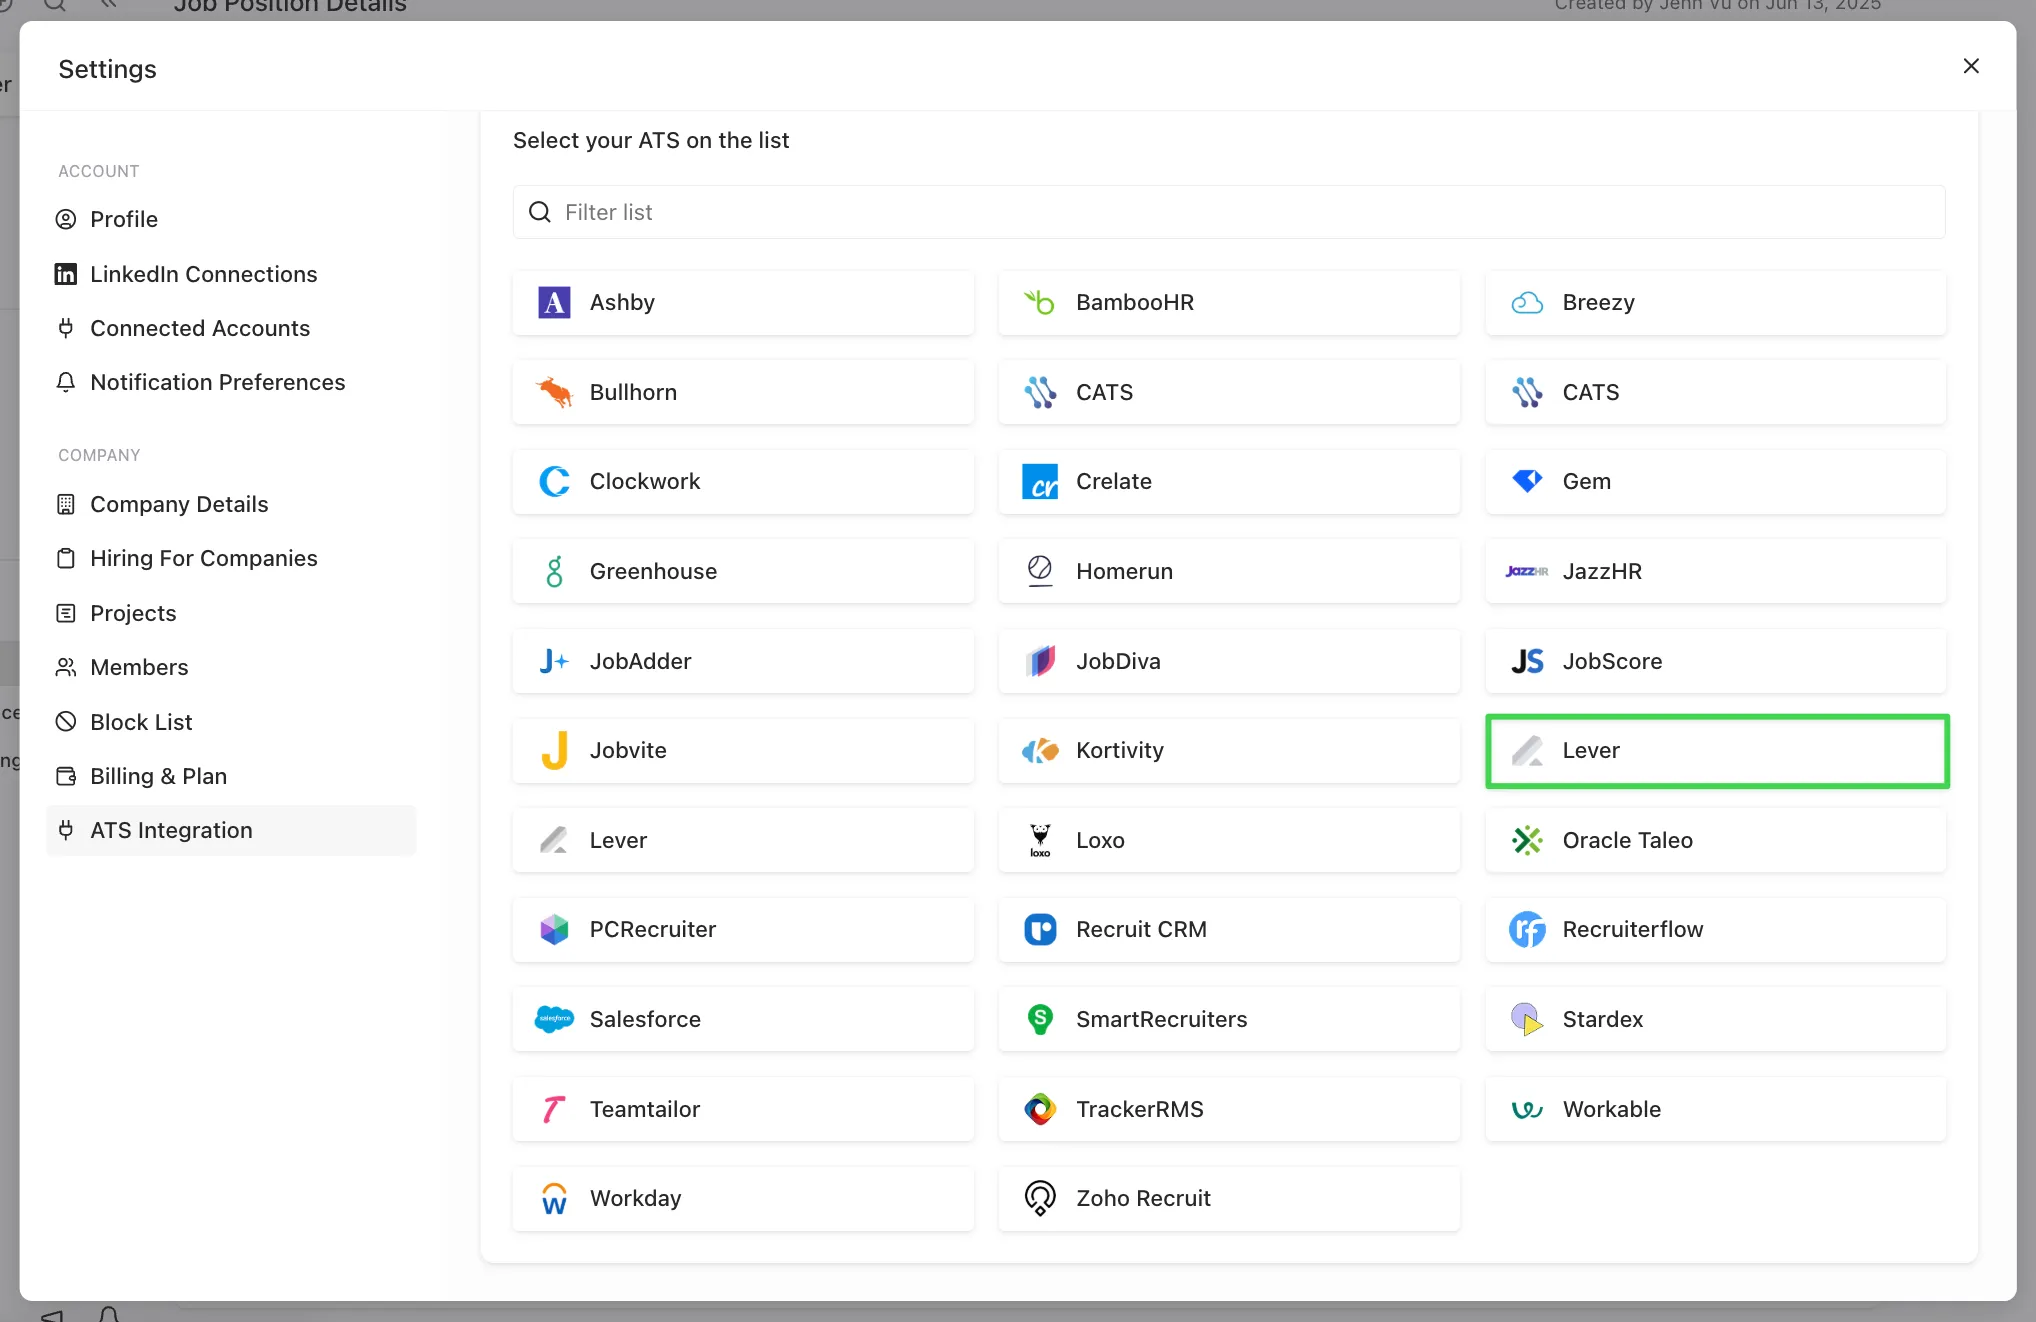
- Navigate to Settings -> ATS Integration and select Lever from the list. Be sure to select the one highlighted in the screenshot below.
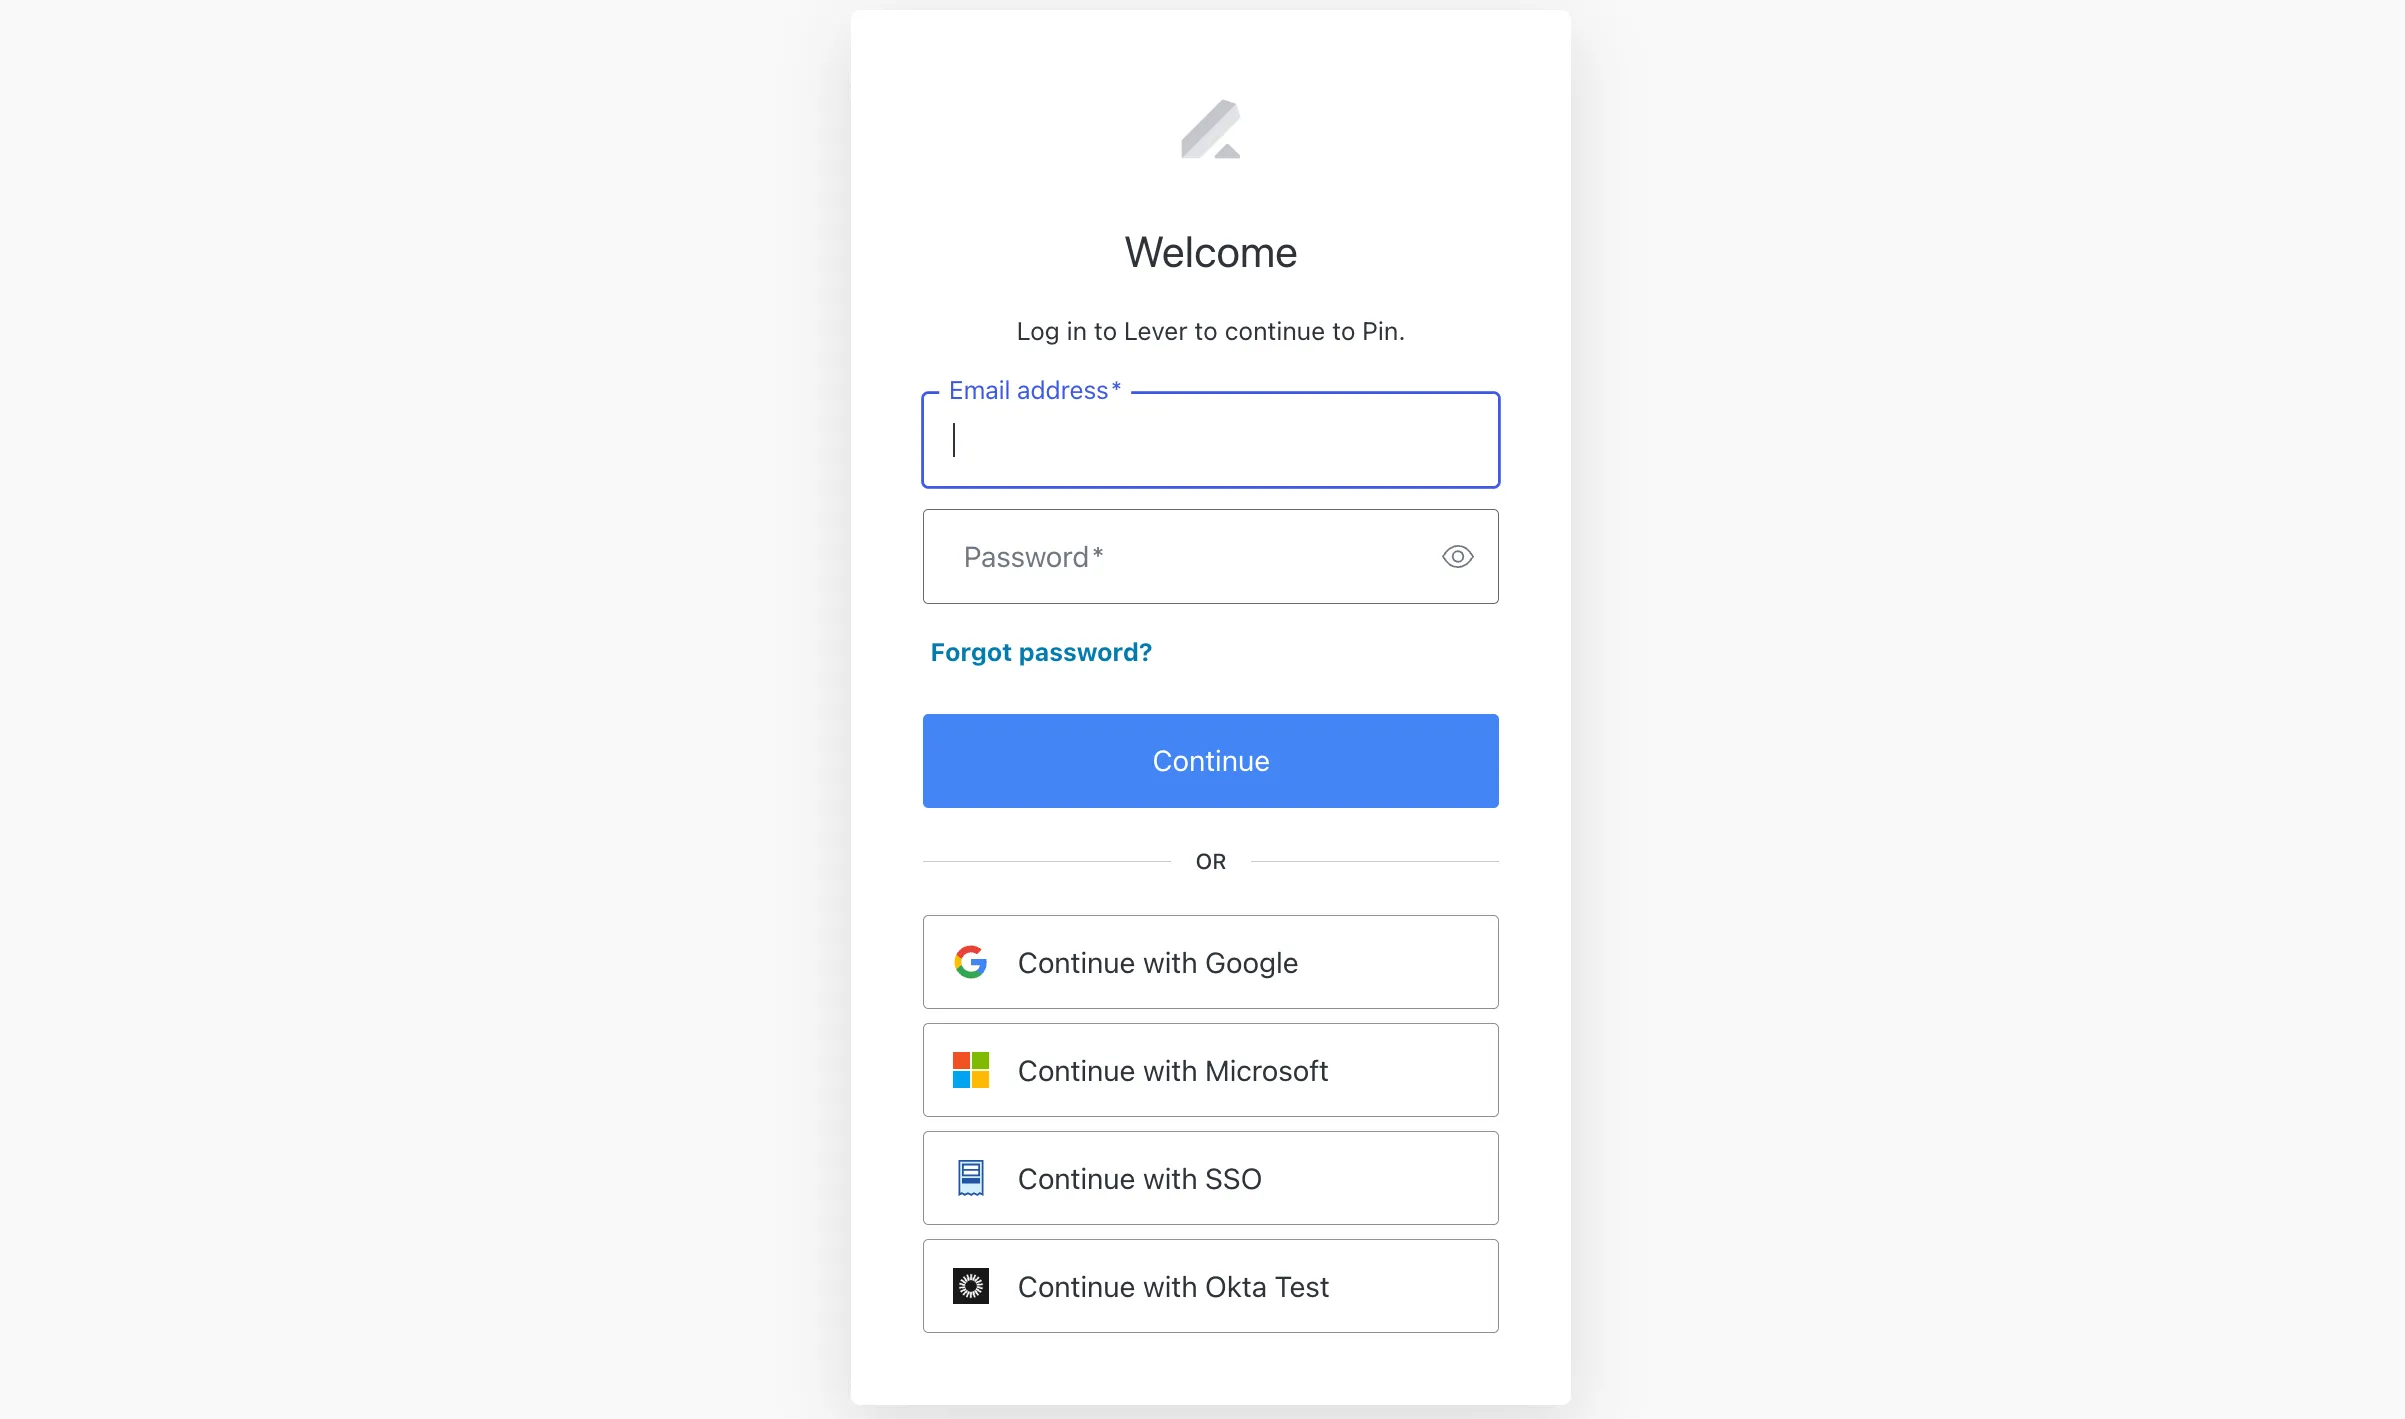
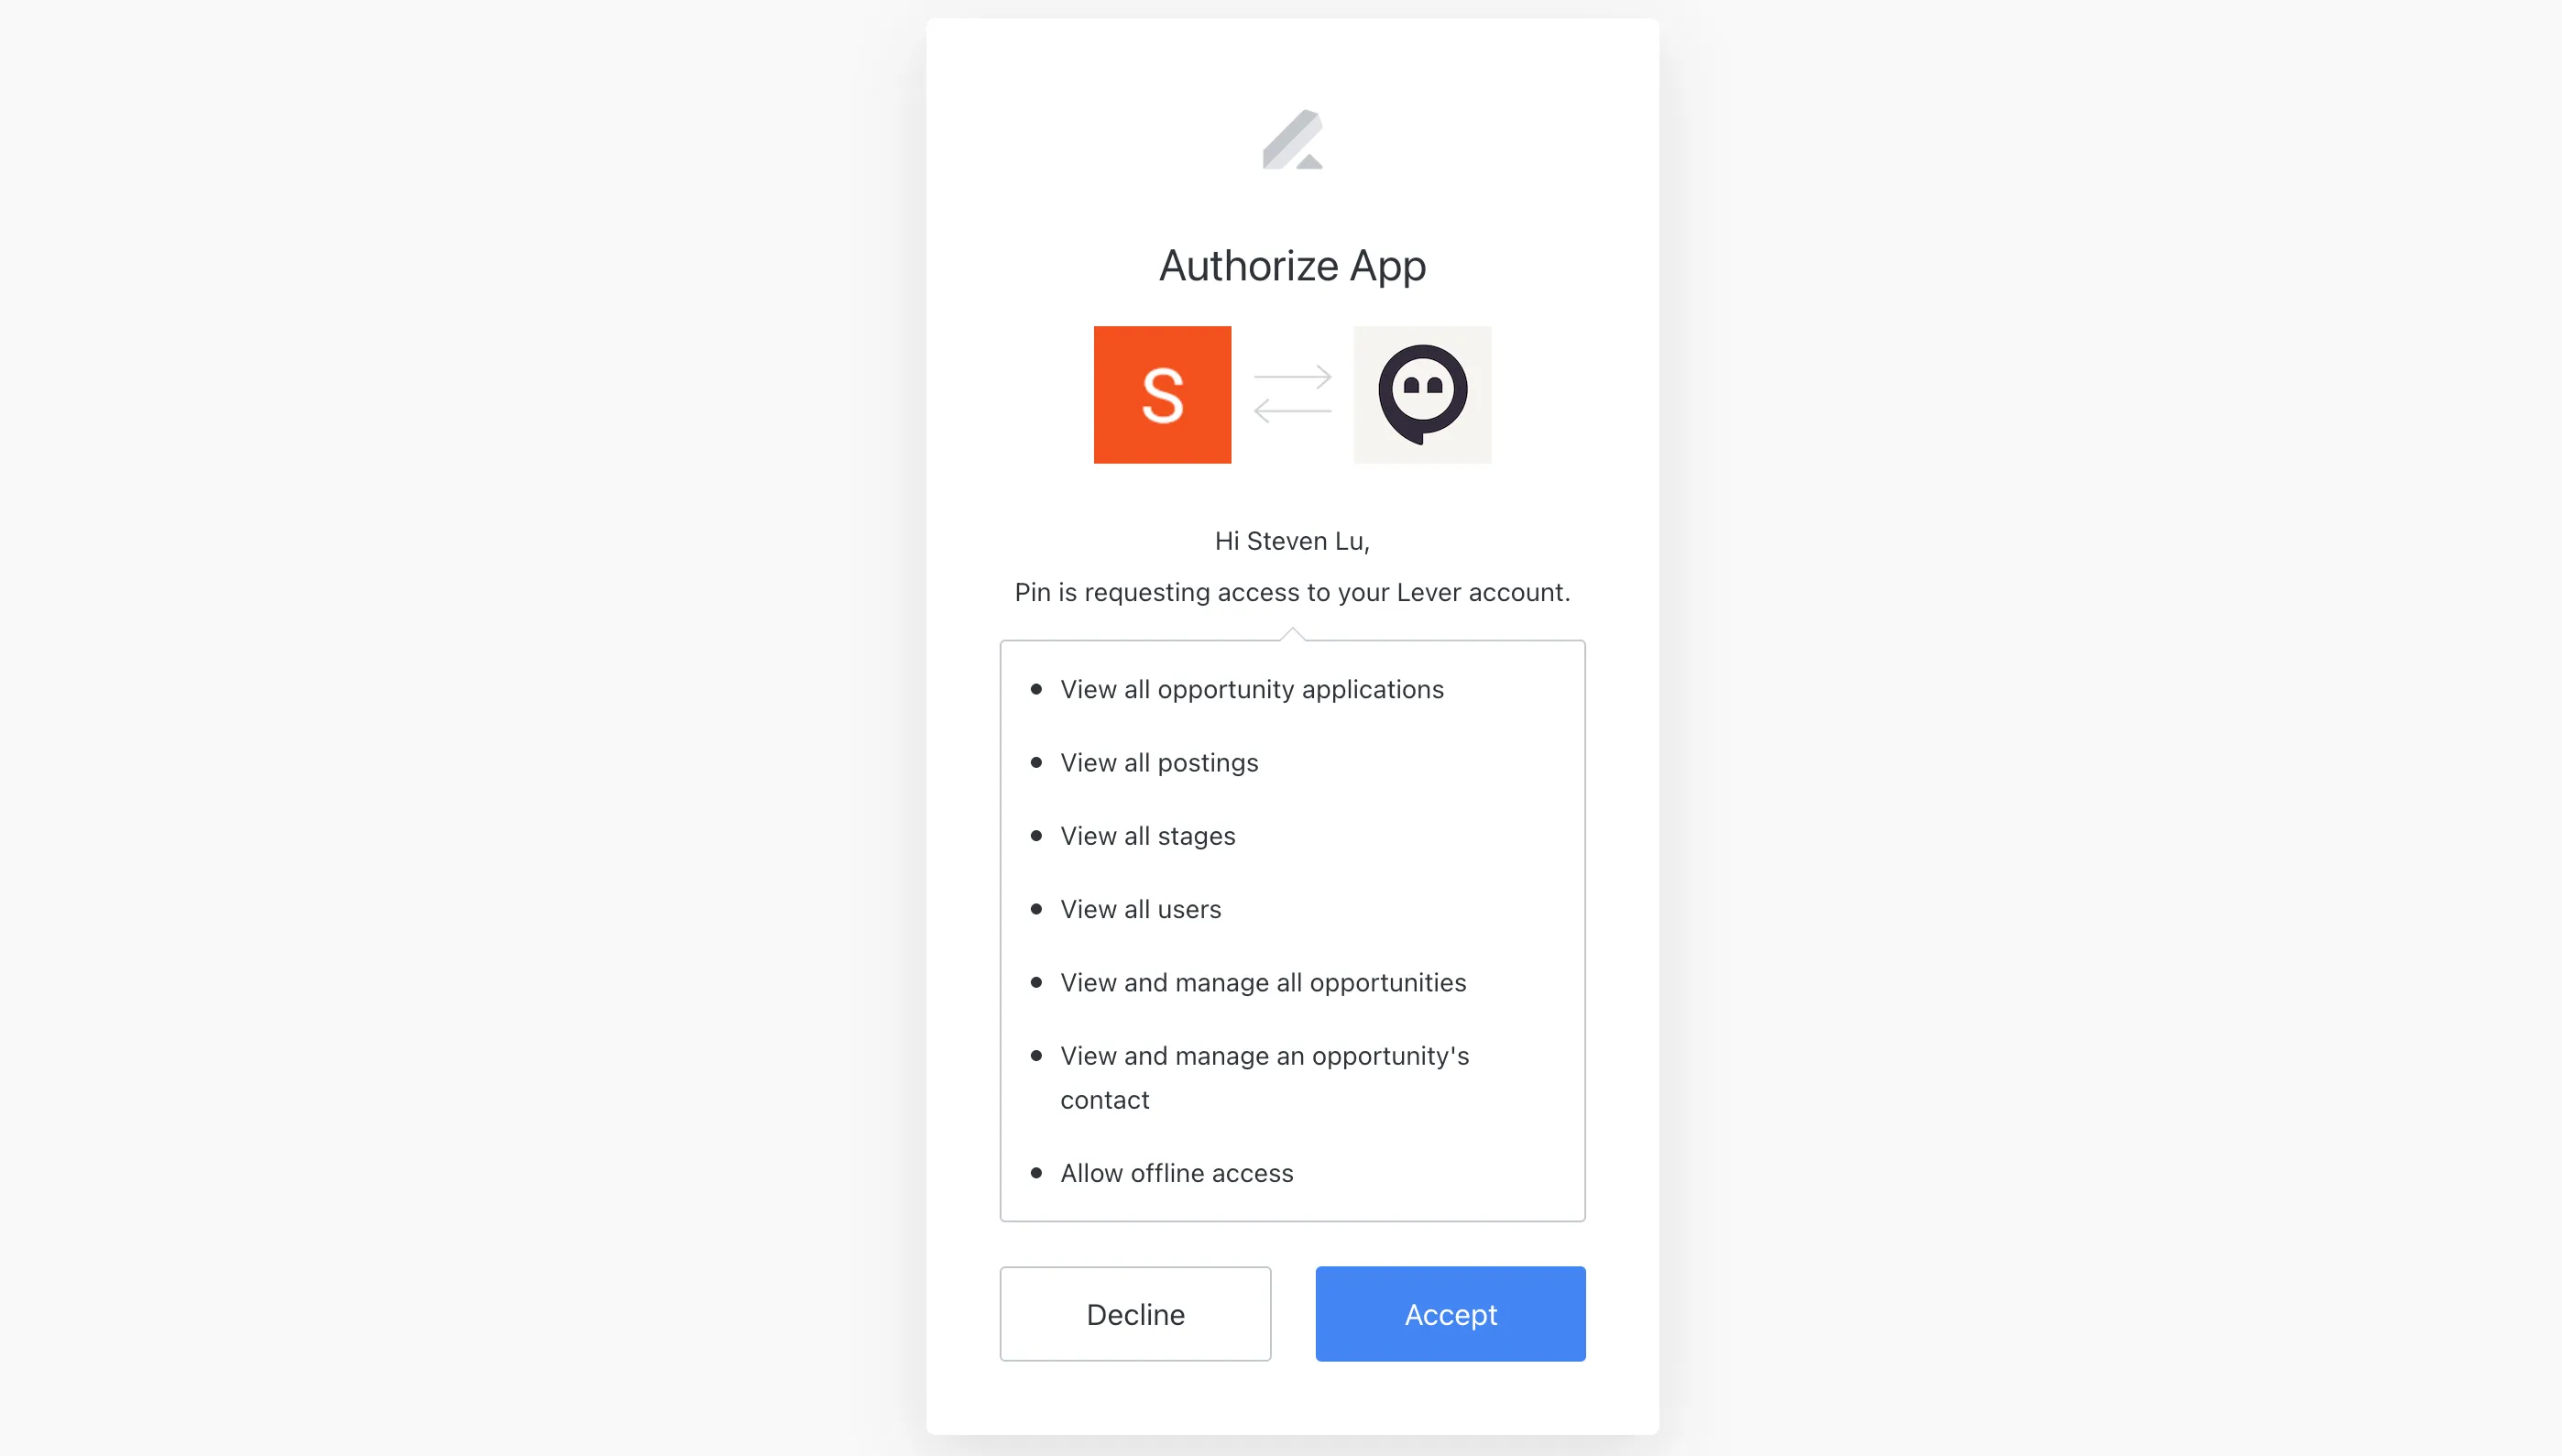
- Enter your Lever login credentials and grant Pin permission to access your Lever account.
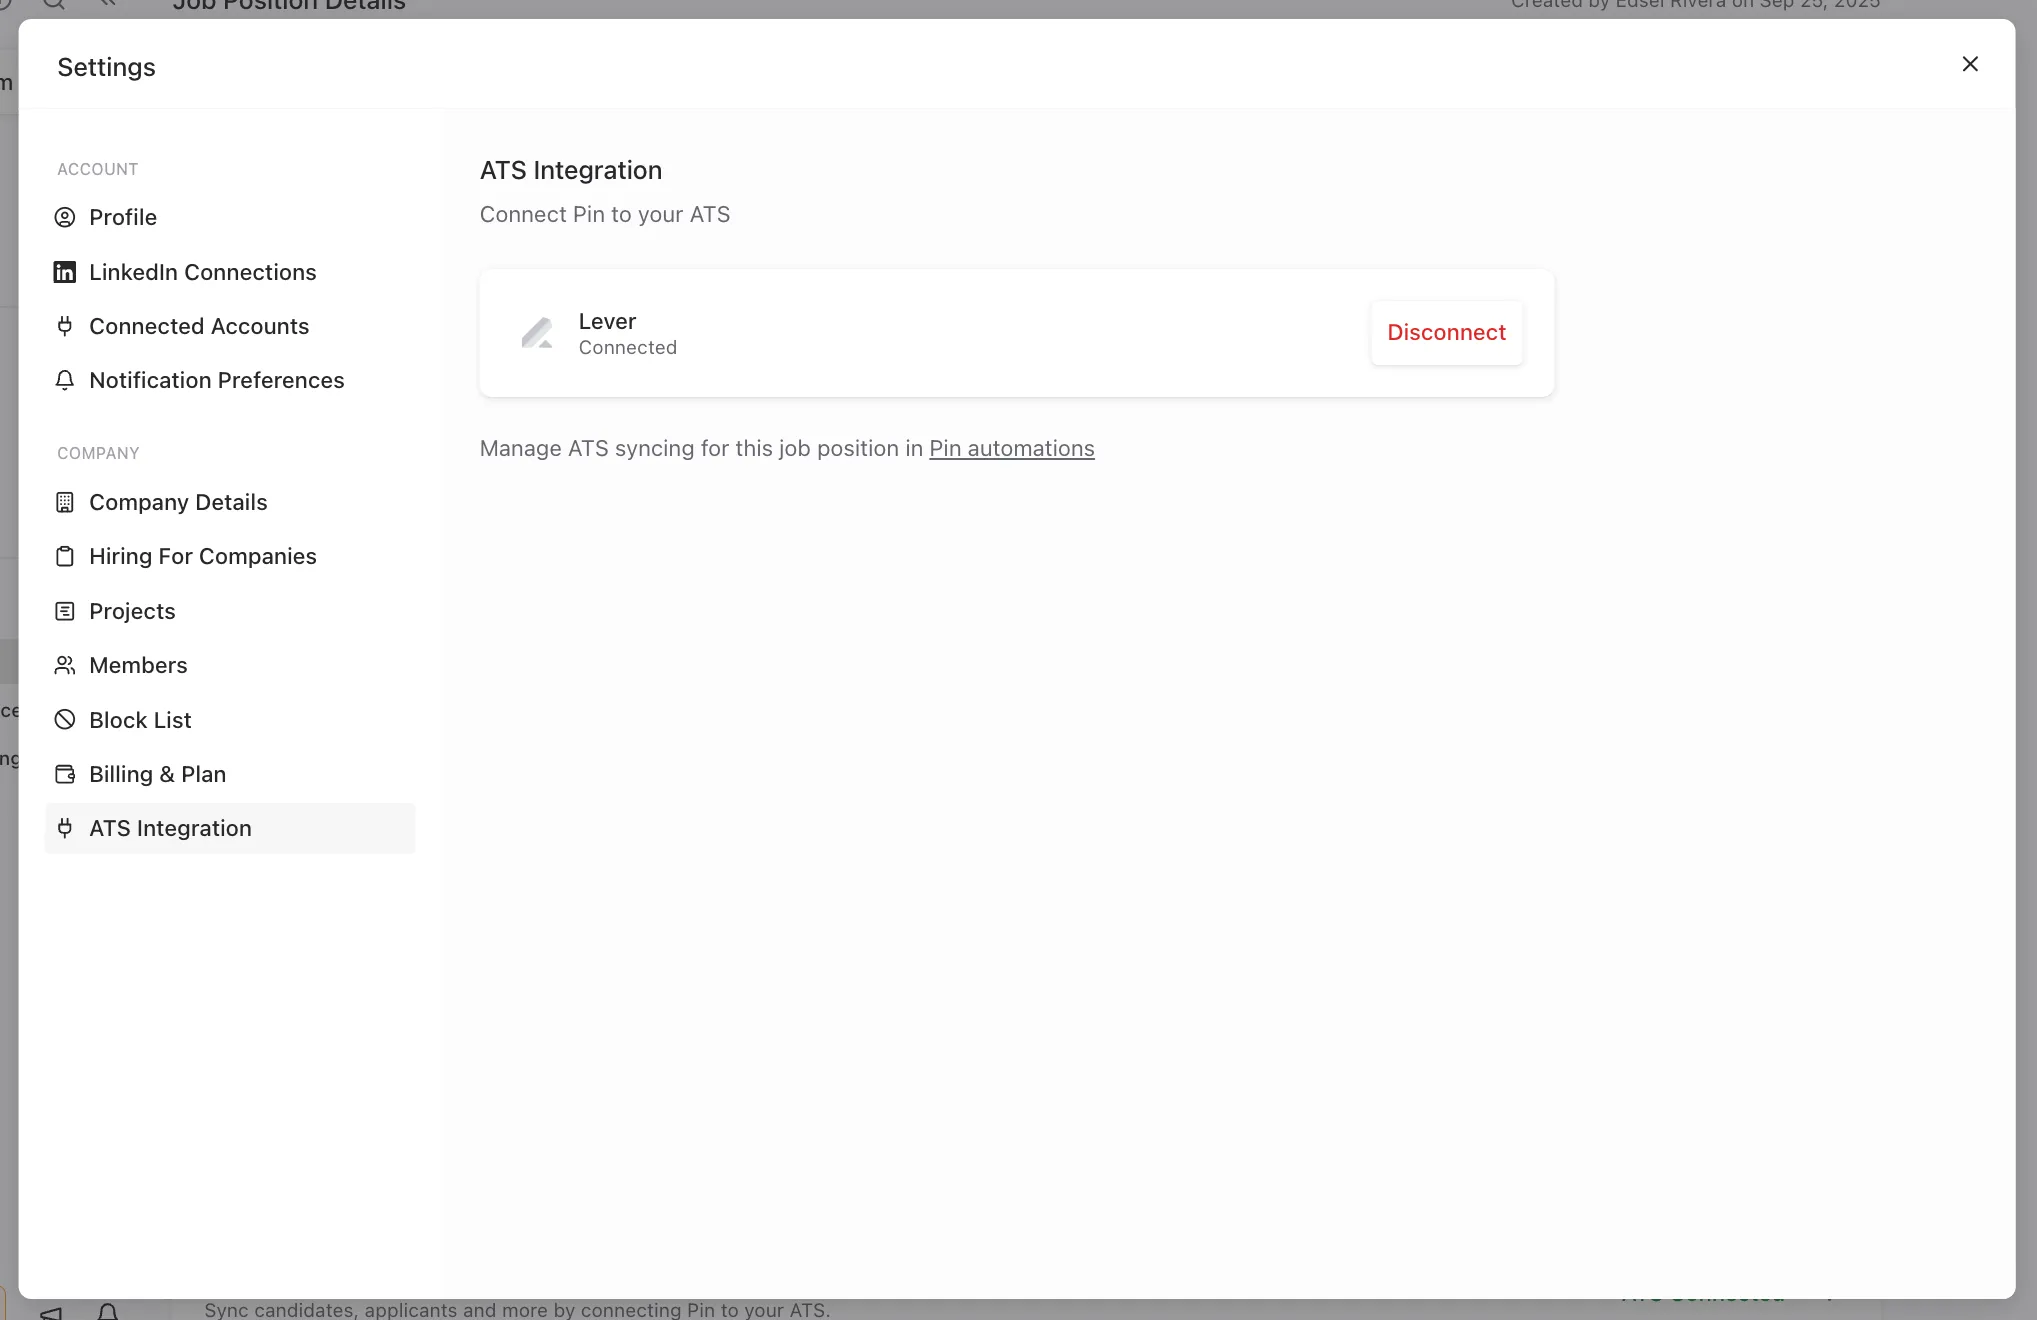
- After granting Pin permission to access your Lever account, the integration will be connected.
Note: You'll need to have Super Admin level permissions to connect to Lever.
Syncing candidates to Lever
To sync candidates from each job in Pin to a specific job in Lever:
- Go to Job Settings -> Position Details.
- Scroll to the ATS Integration section.
- Choose when to sync candidates by selecting one of the following triggers:
- Never
- Contact information is found
- They receive their first message
- They reply to an email
- They reply to an email and are interested
- Select the Lever job you want to sync candidates to.
Once you've selected your preferred trigger, Pin will automatically update the settings and sync candidates to the selected job in Lever based on the chosen trigger.
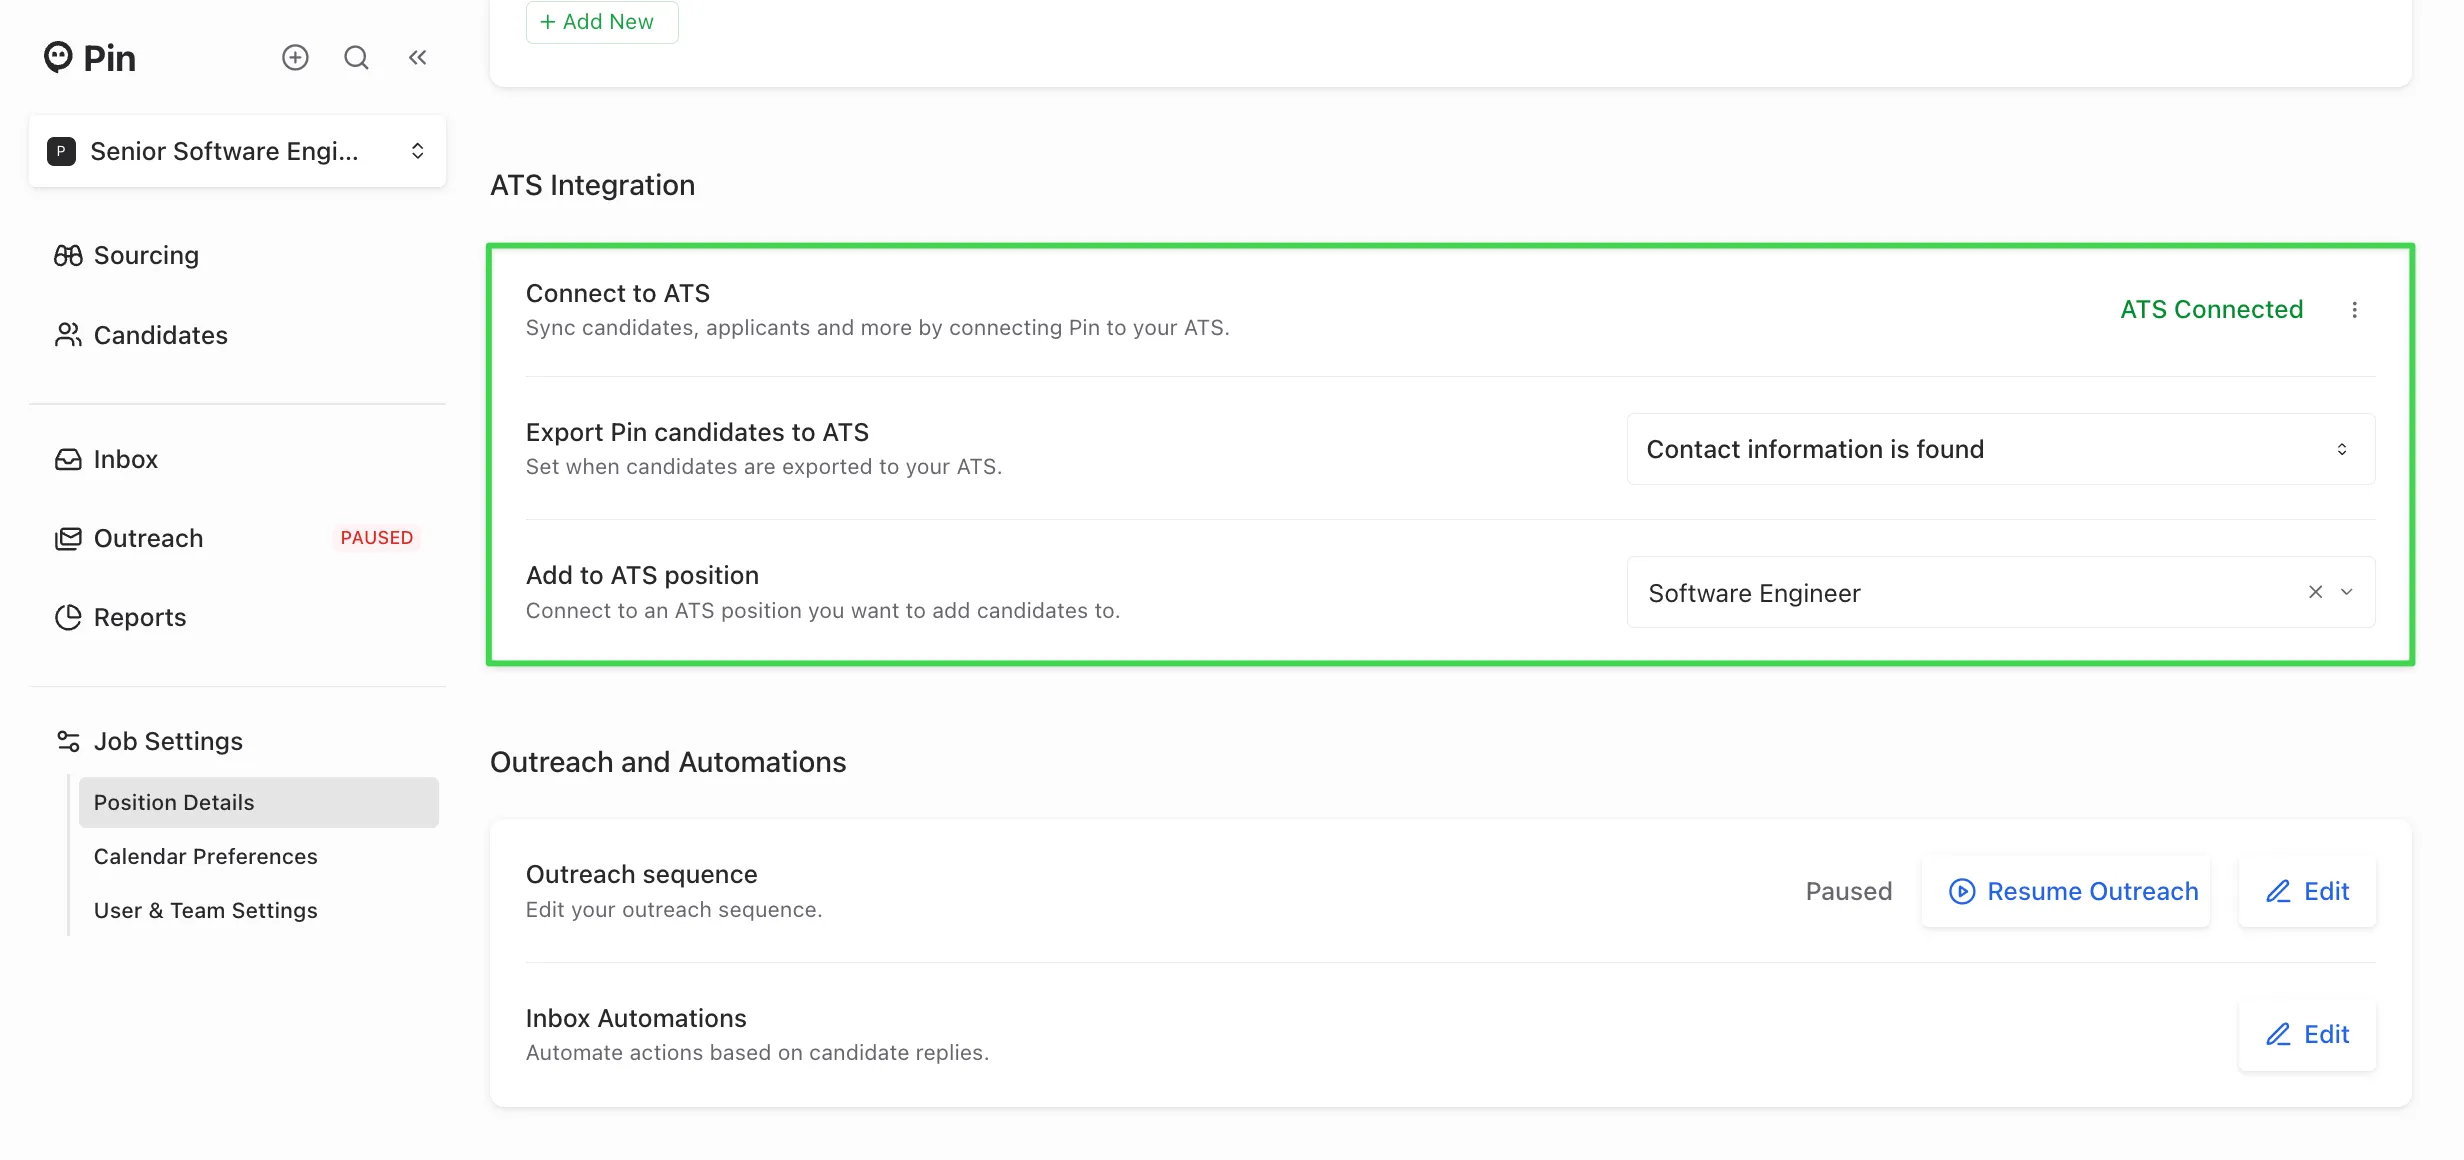
Reminder: You’ll need to set up the syncing for each job you want to send from Pin to Lever in the Position Details tab within the Job Settings. We recommend setting up the job sync before adding candidates to Outreach. This ensures candidates sync correctly to the job without issues.
If you prefer not to sync candidates to a job, you can still set up a trigger and leave the job field empty.
When candidates sync to Lever
Once the selected trigger occurs, candidates will sync to Lever within a few minutes.
For example: if you choose the trigger “Export candidates when contact information is found”, the candidate will automatically sync to Lever a few minutes after being added to Outreach.
Checking if a candidate synced to Lever
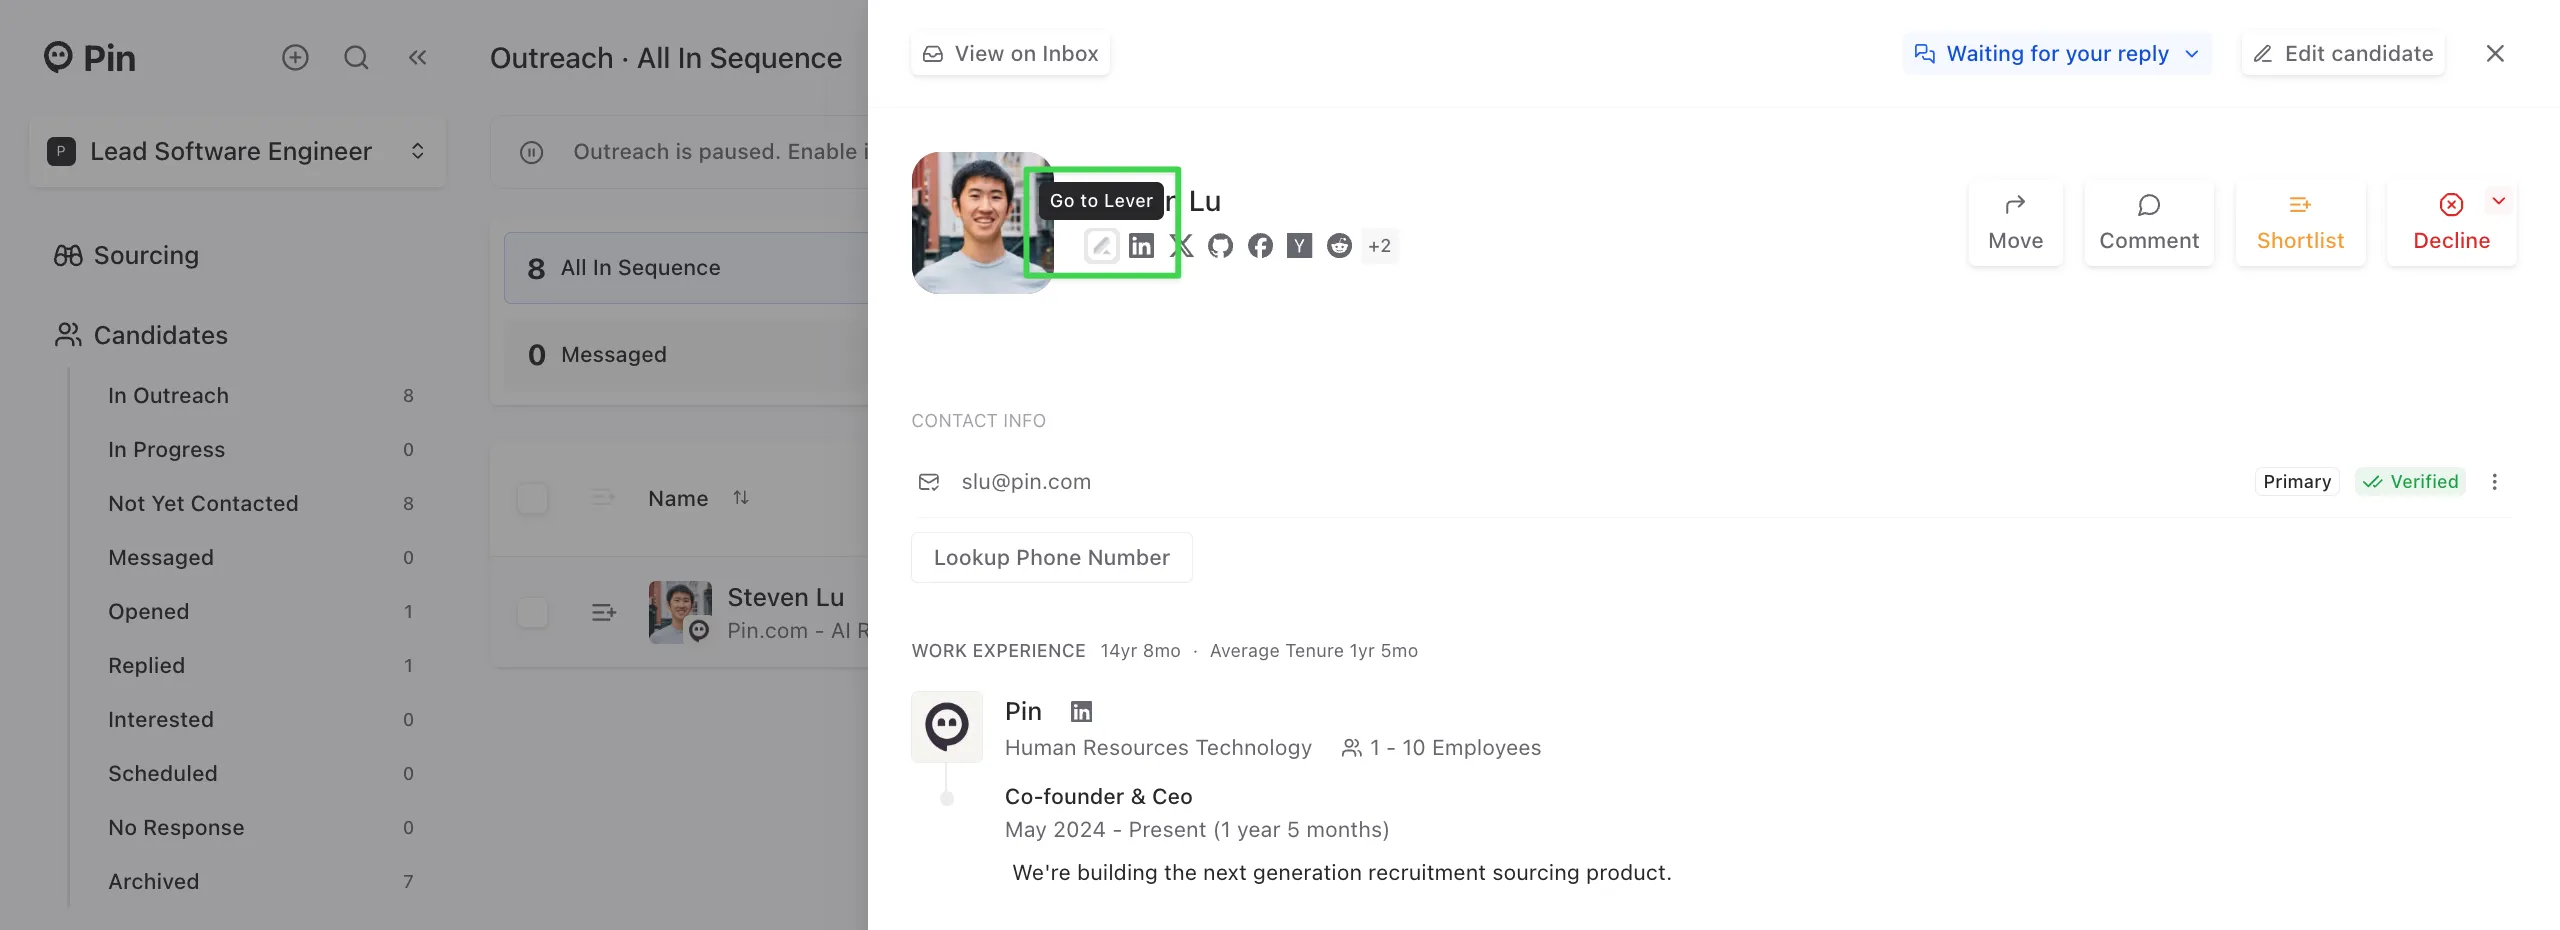
To confirm if a candidate has synced to Lever, you can open their profile in Pin. If you see the Lever logo, this means that they’ve been successfully synced. Clicking the logo will take you directly to their profile in Lever.
Manually syncing a candidate to Lever
If the candidate hasn’t synced yet:
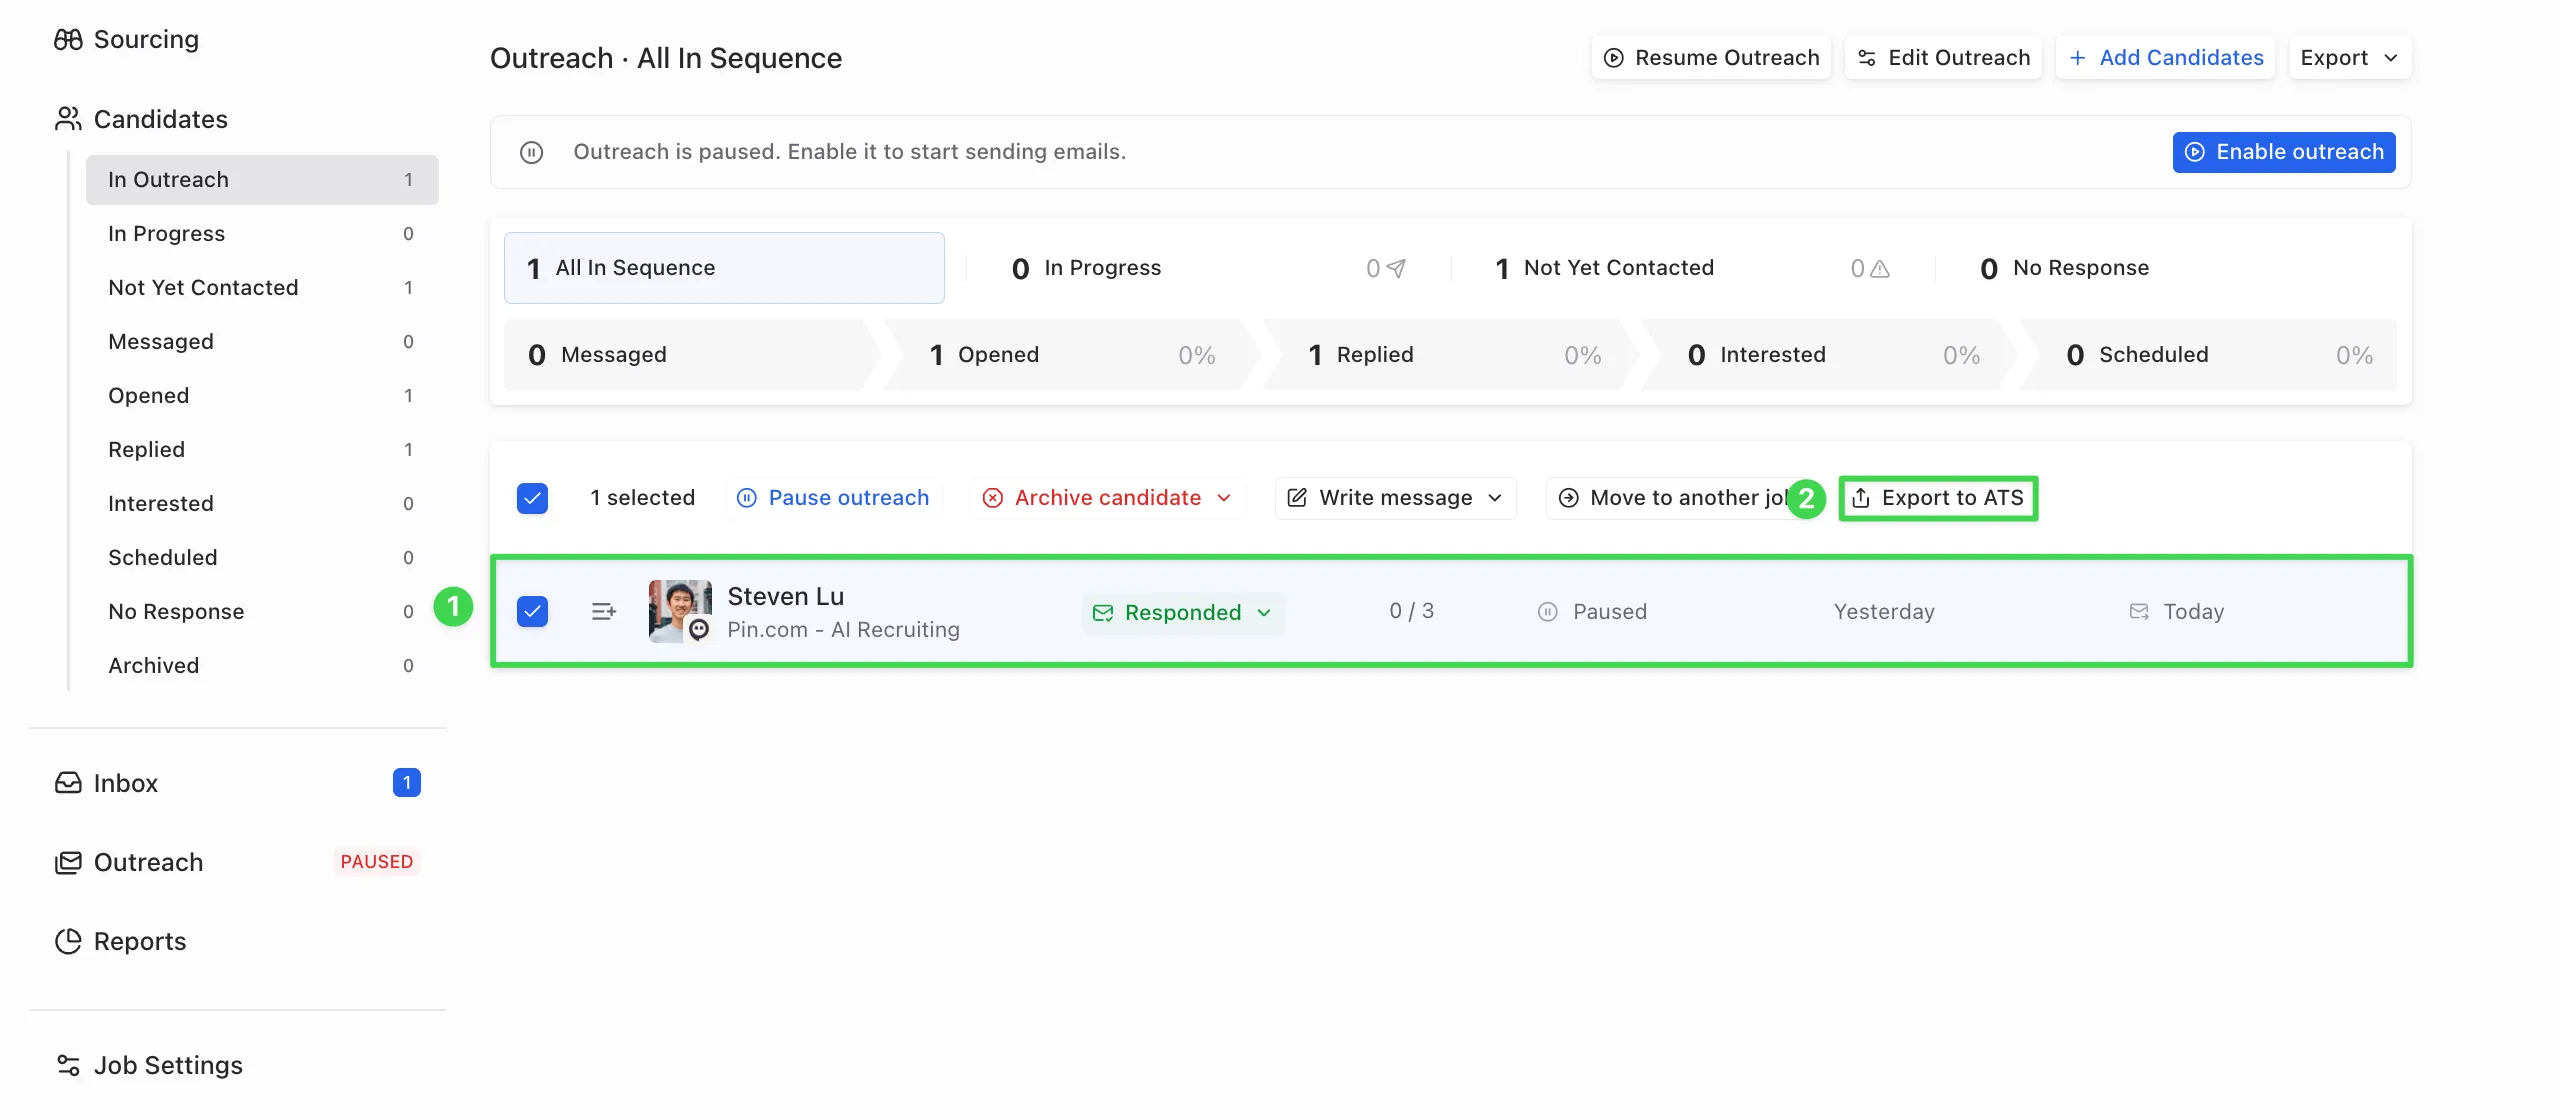
- Select the candidate in Pin.
- Click “Export to ATS”.
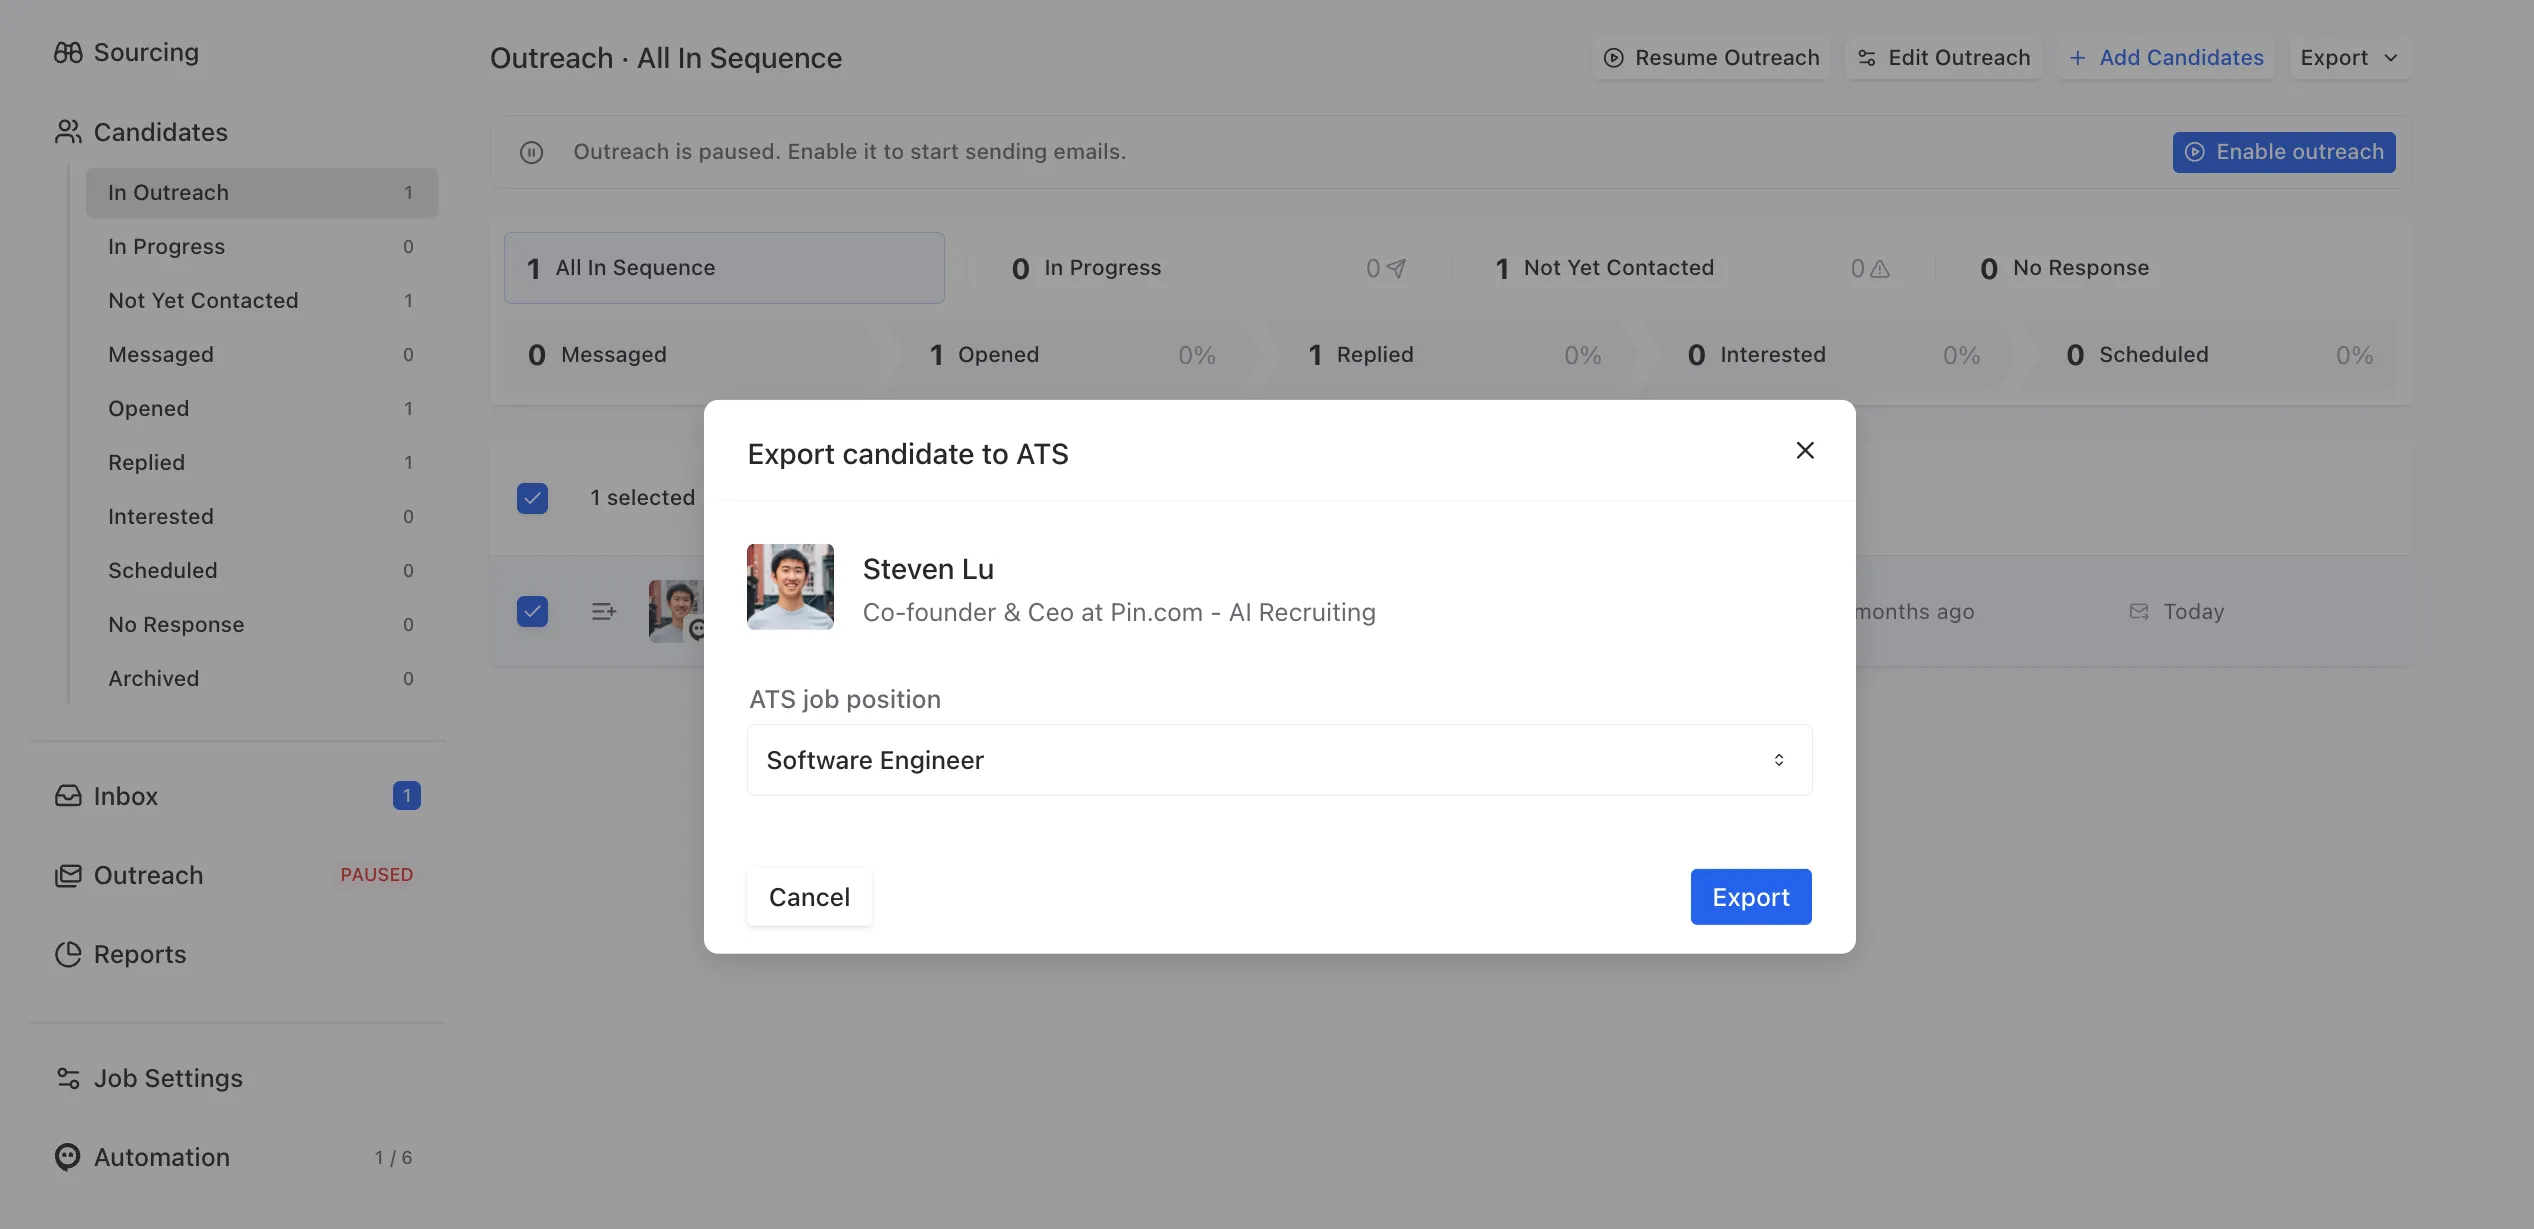
- Choose the Lever job you want to sync the candidate to, then click “Export” to complete the sync.
- After exporting, refresh the page, and you should now see the Lever logo appear on their profile.
Important:
- Once a candidate is synced to Lever, their contact information cannot be re-synced. If some information didn’t sync, you’ll need to manually update that candidate’s profile in Lever.
- The "Export to ATS" button only works for candidates who haven’t already synced to Lever. If an integration was connected after the selected trigger, Pin won’t retroactively sync those candidates. In that case, use the "Export to ATS" button to sync them over.
How the candidate will appear in Lever
After syncing from Pin to Lever, this is how the candidate profile will appear in Lever.
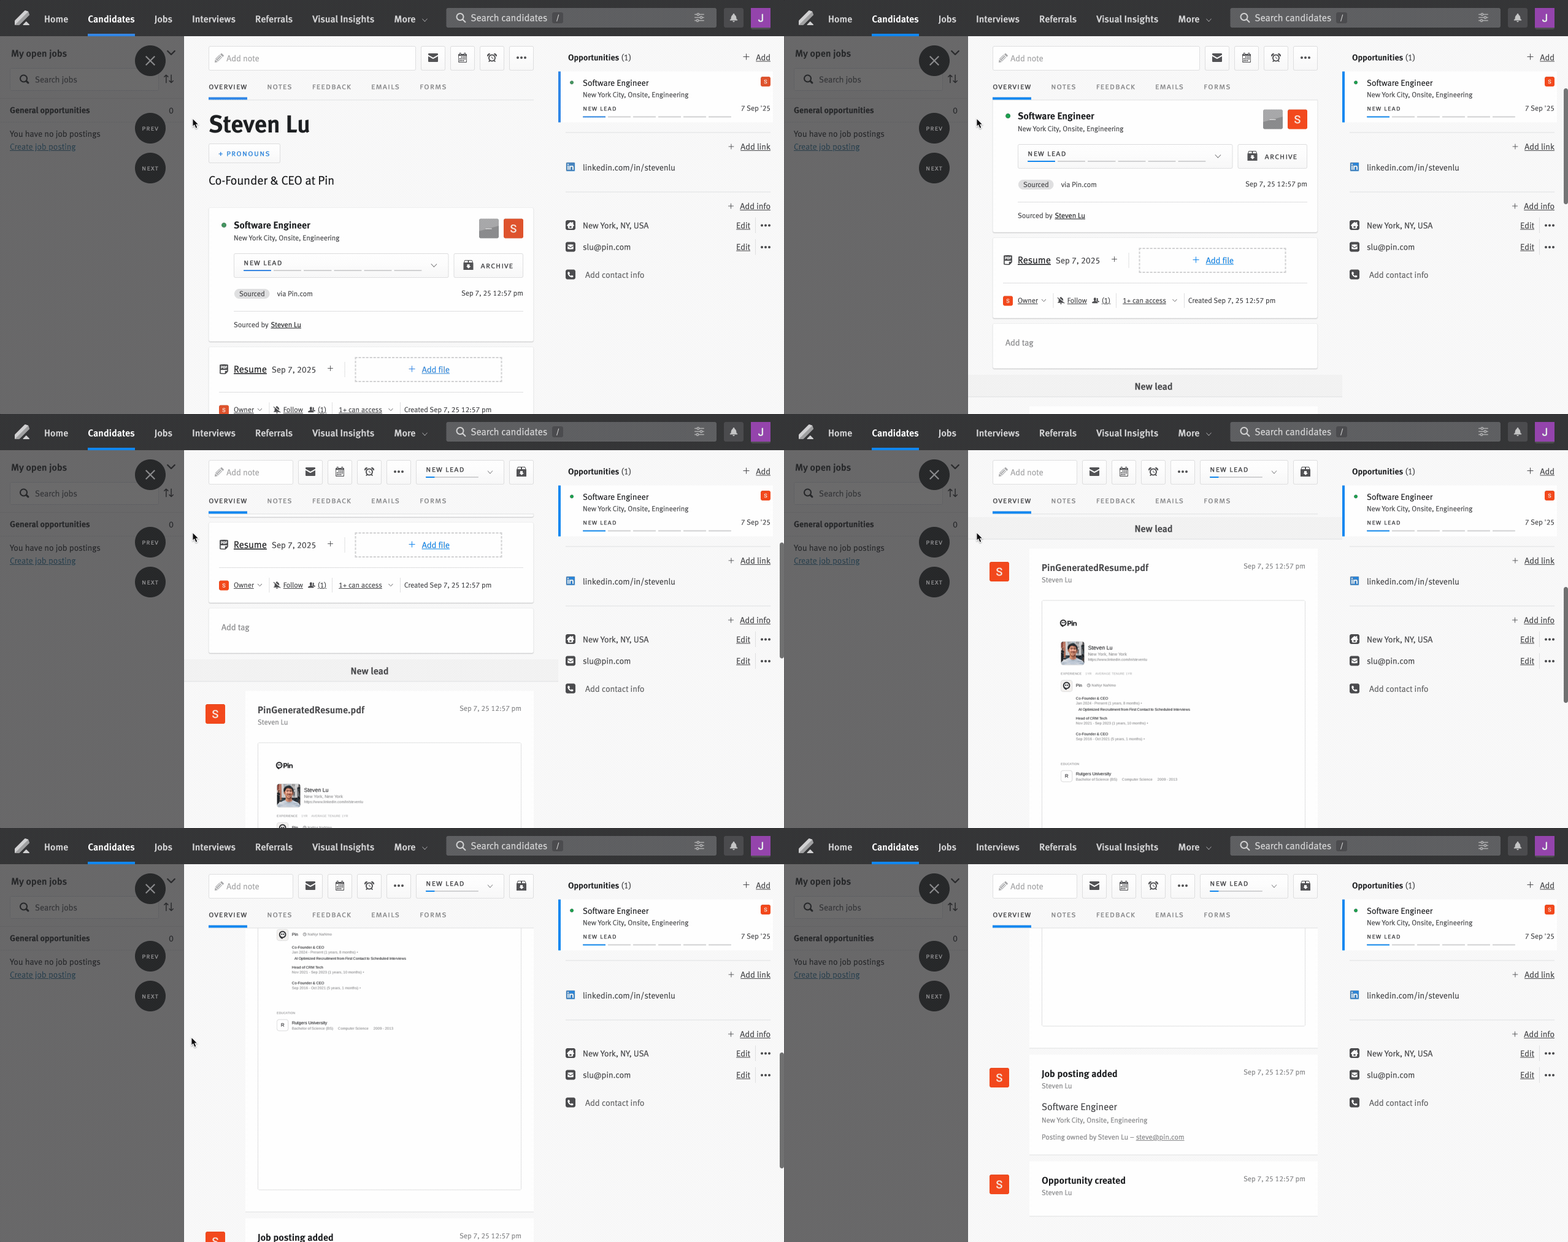
Candidate data synced to Lever
The following candidate data will sync to Lever from Pin:
- Full name
- Phone number
- LinkedIn profile URL
- Location (city, state, country)
- Current job and company
- A Pin generated resume PDF
- If the candidate was sourced from Pin
- Which team member sourced the candidate
Note: All candidates will automatically sync into Lever as leads.
How Pin checks for duplicates in Lever
Pin runs a check before syncing whenever a candidate is added to Outreach to prevent duplicate profiles. For Lever, duplicates are checked against:
- Email address
- LinkedIn URL
If a match is found on either field, Pin will not create a new candidate profile in Lever.
Add Lever candidates to Pin
To add Lever candidates to Pin, export them from Lever as a CSV, then upload that file to the relevant job in Pin. To avoid import errors, you can download and use Pin’s CSV template, and ensure your column headers and data formats match the template. You can download the CSV template here.
Note: The “ATS Candidates” search filter is not supported on Lever. The only way to add Lever candidates to Pin is via CSV import.