
Integrating with Spott
This guide covers:
Pin integrates directly with Spott (V2), so candidates and job positions you work in Pin can sync straight into your Spott pipeline. This guide walks through generating an API key in Spott and connecting it in Pin.
Before you start: You'll need admin access in Spott to generate an API key, and access to Settings → ATS Integration in Pin to connect it.
Generate an API key in Spott
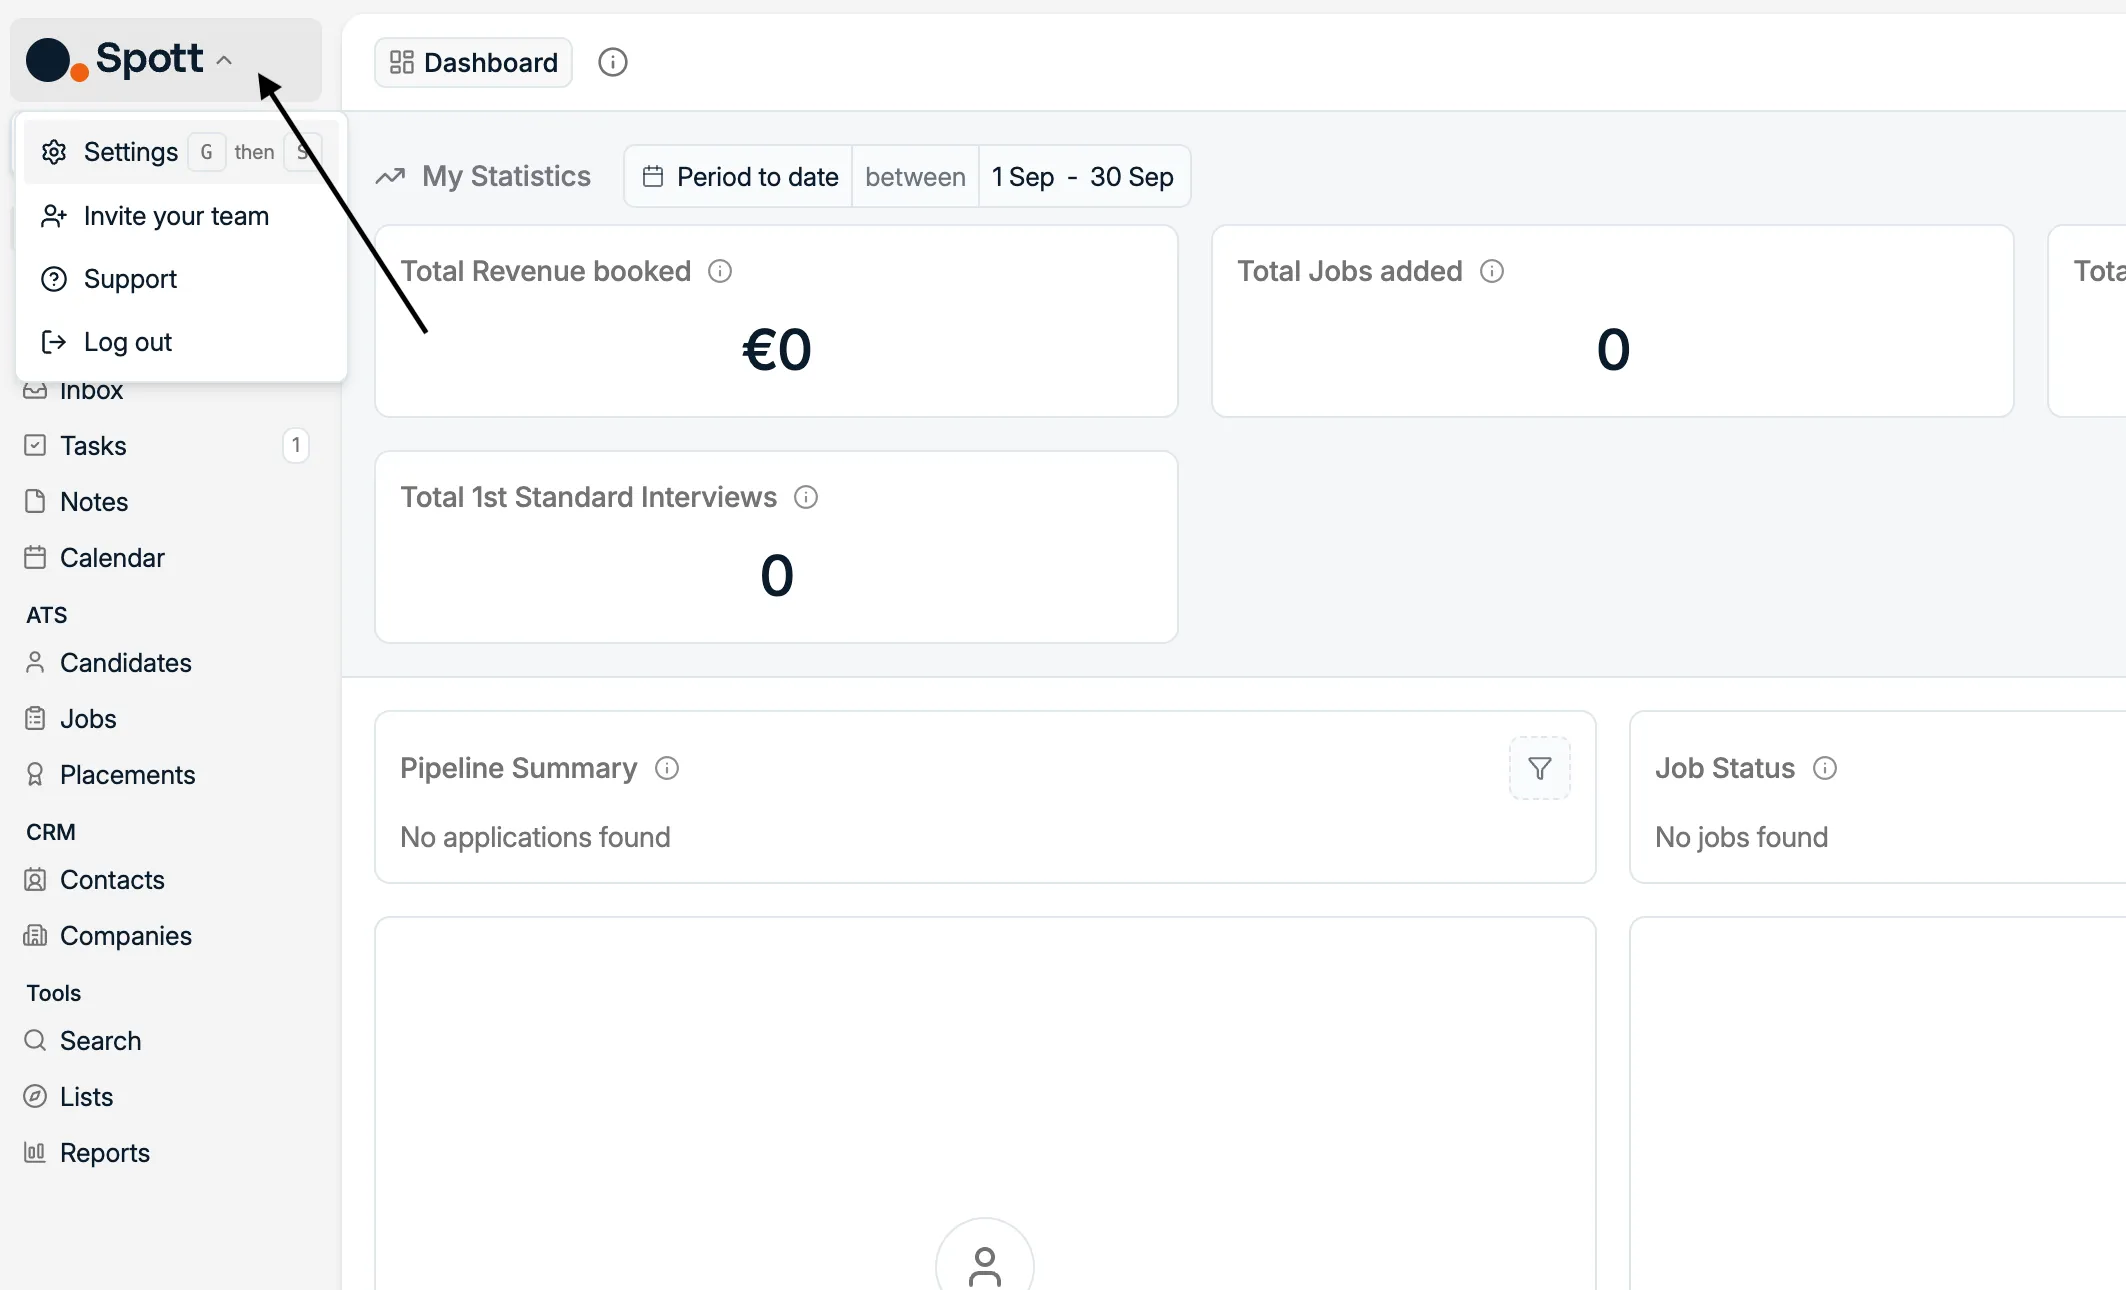
- In Spott, click your workspace name in the top-left corner and select Settings.
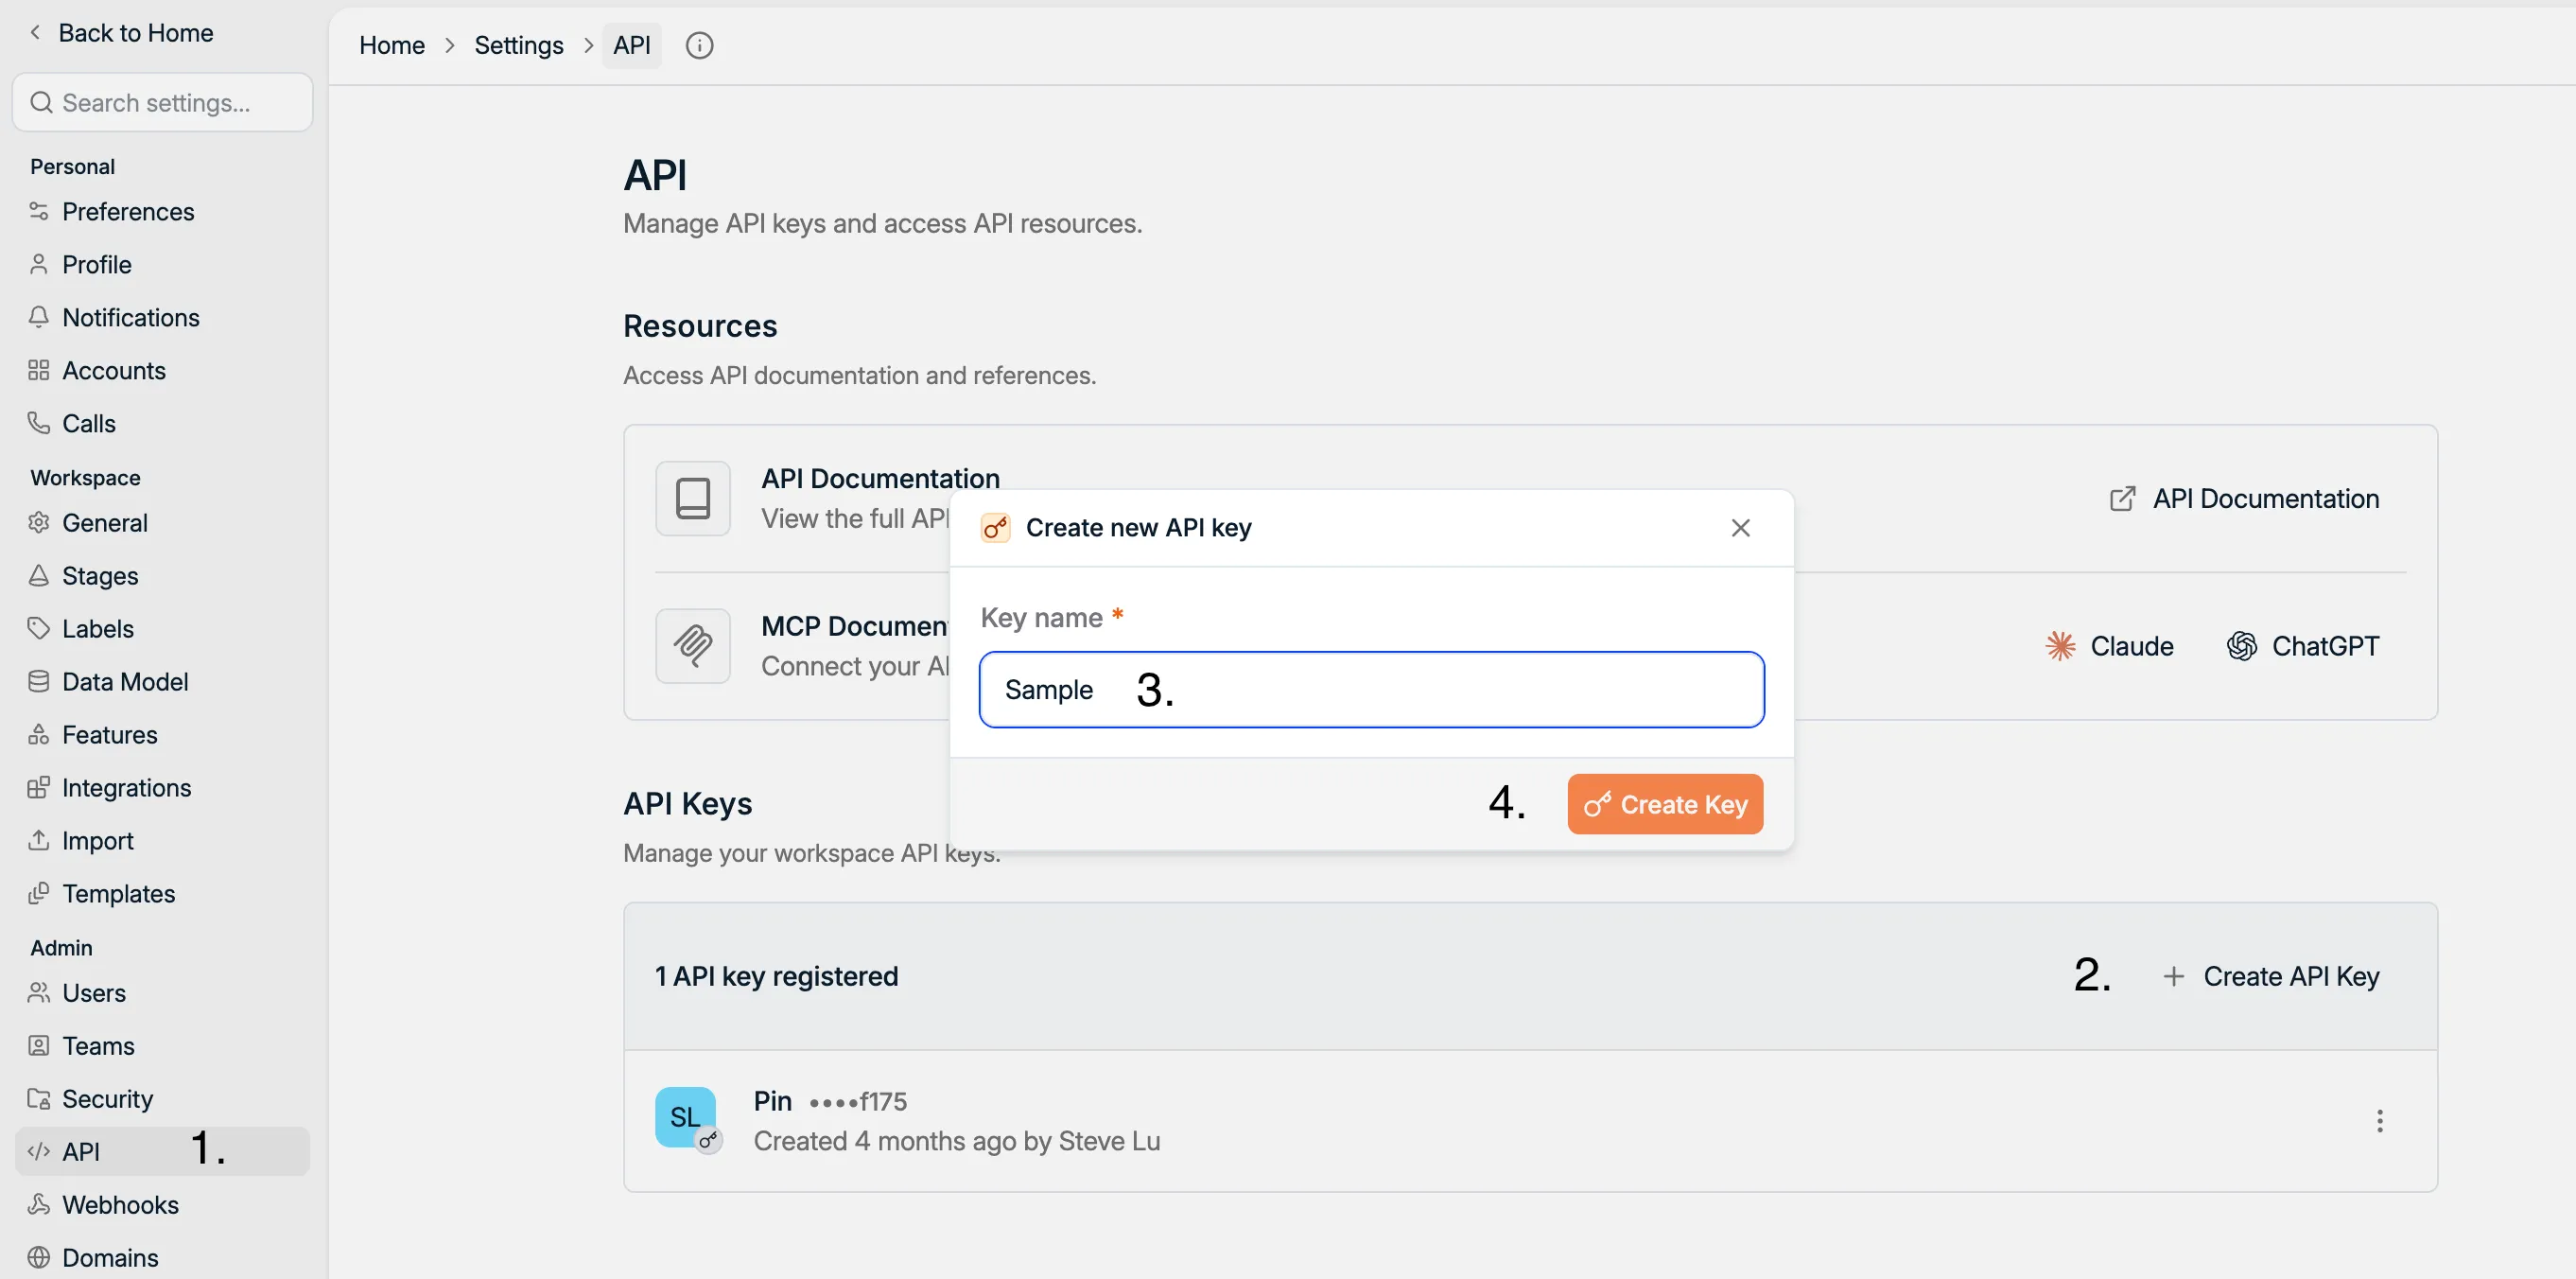
- In the Settings sidebar, go to API, then click + Create API Key.
- Give the key a name that makes it easy to identify later — for example, Pin integration — so you (or your team) can tell at a glance what it's used for if you need to manage or revoke it down the line.
- Click Create Key.
- Spott shows the new key once. Click Copy Key and save it somewhere safe — you'll paste it into Pin in the next step.
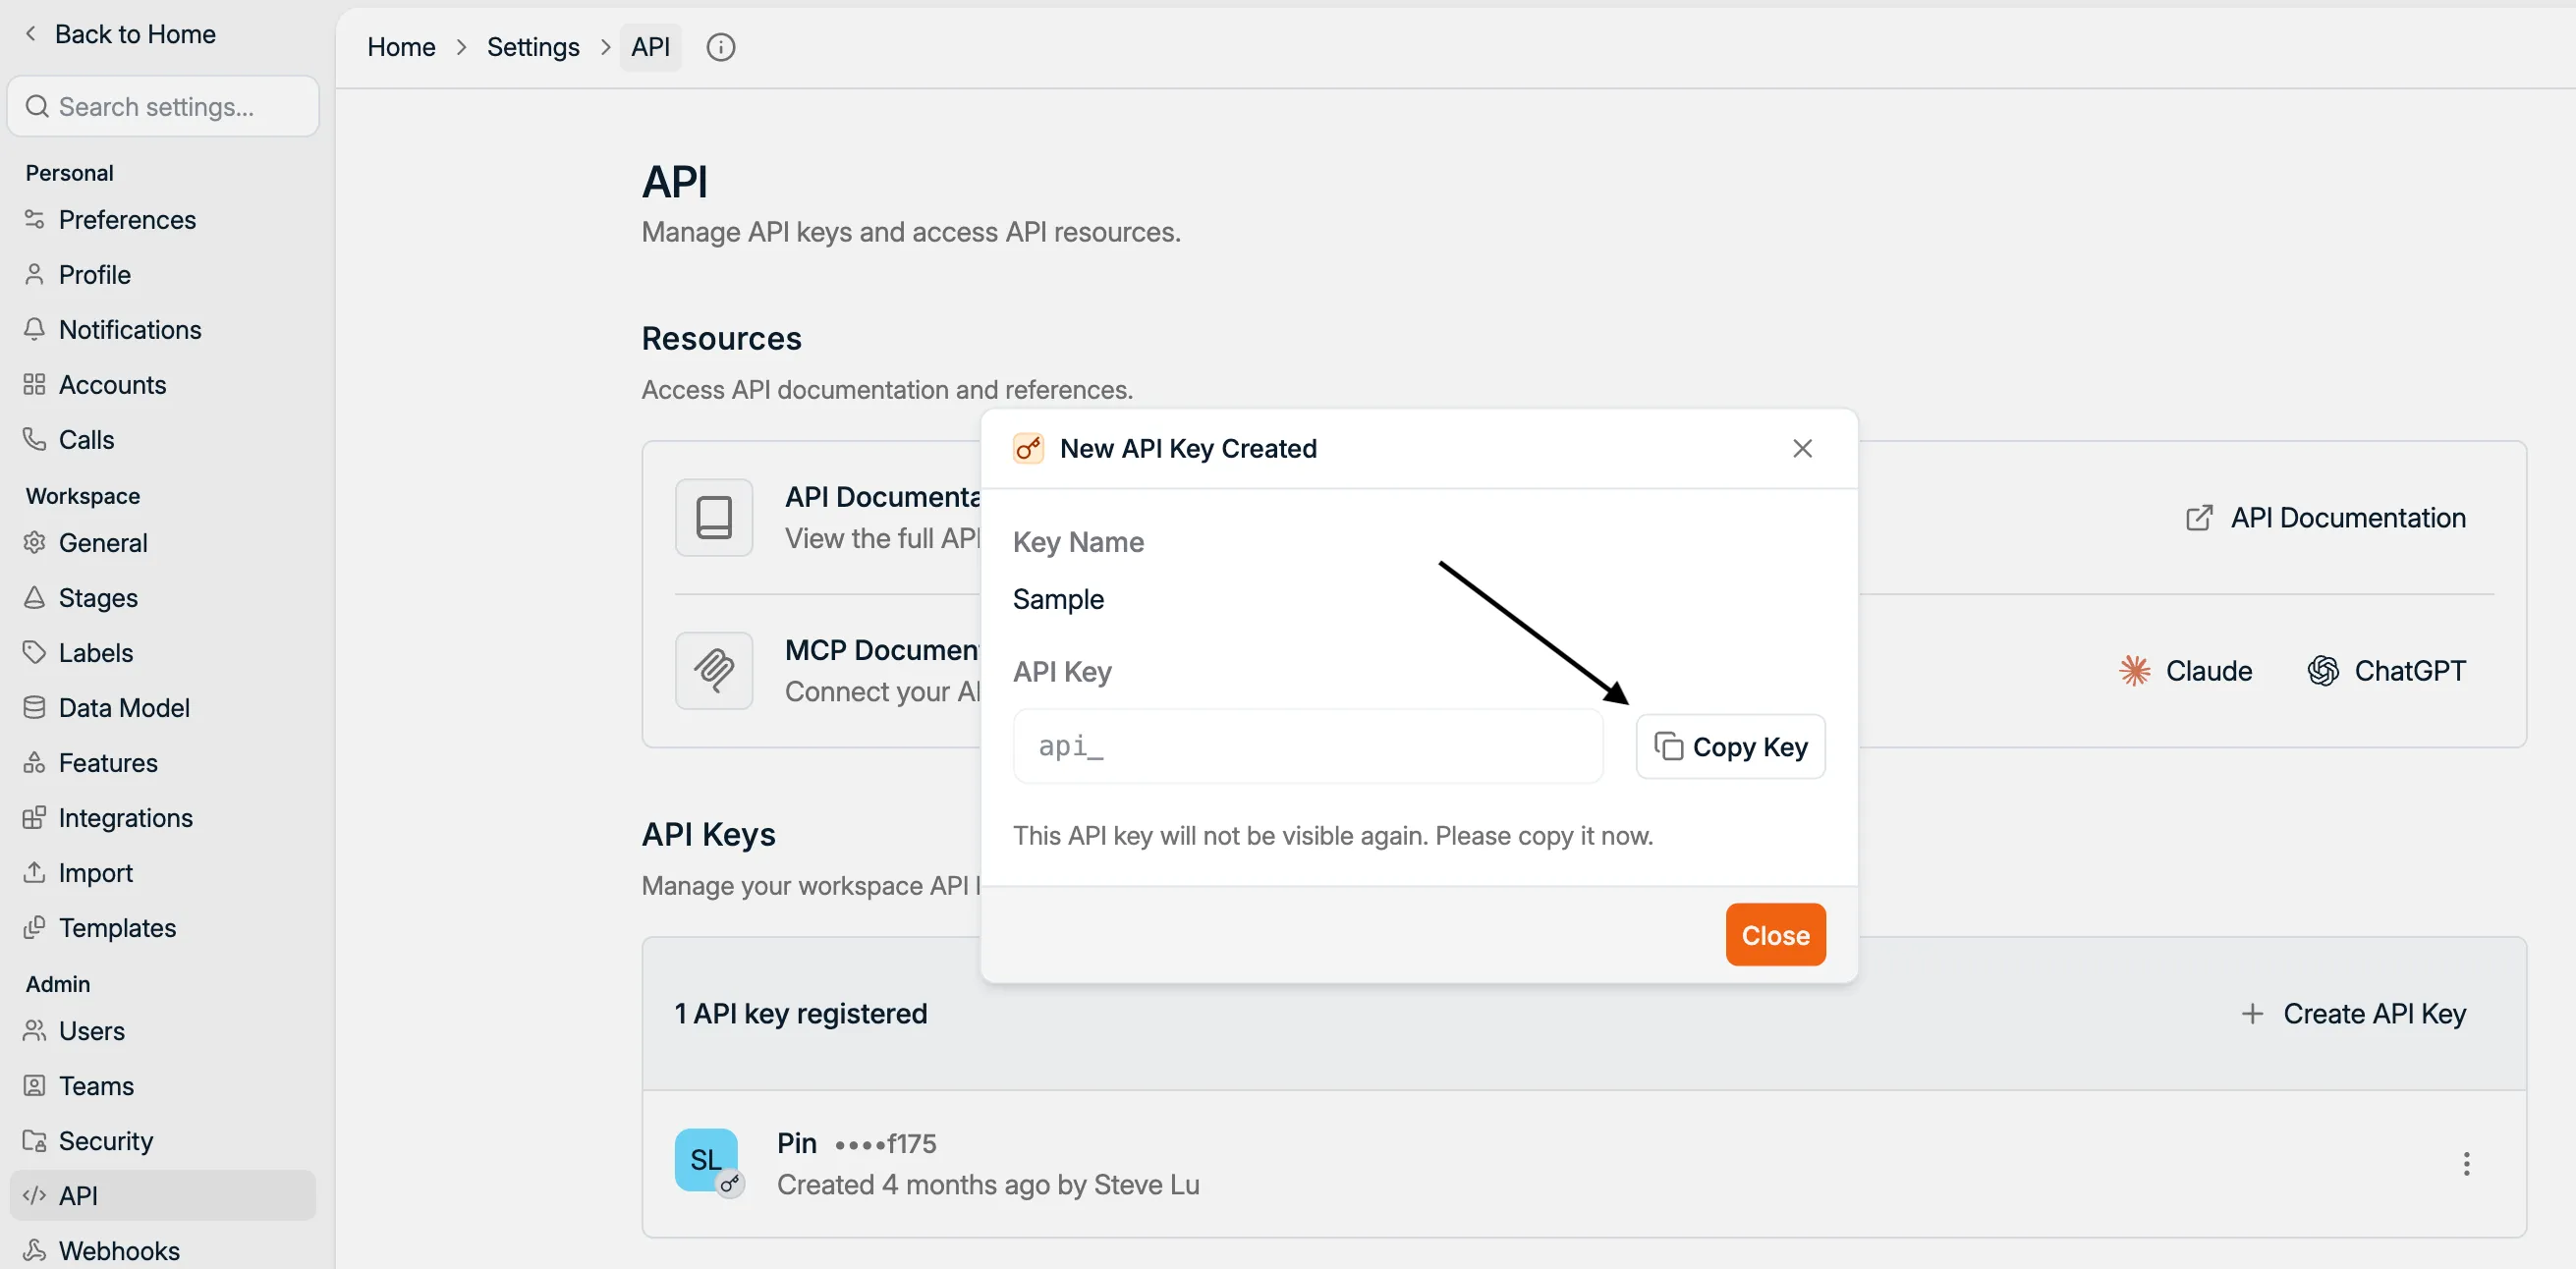
One-time only: This is your only chance to copy the API key. Spott will not show the key again. If you lose it, you'll need to generate a new one and reconnect.
Important: A Spott API key is tied to both your workspace and the Spott user who created it — every action the integration performs will show as done by that user. If that person leaves or loses access, generate a fresh key from another admin account and reconnect.
Connecting Spott to Pin
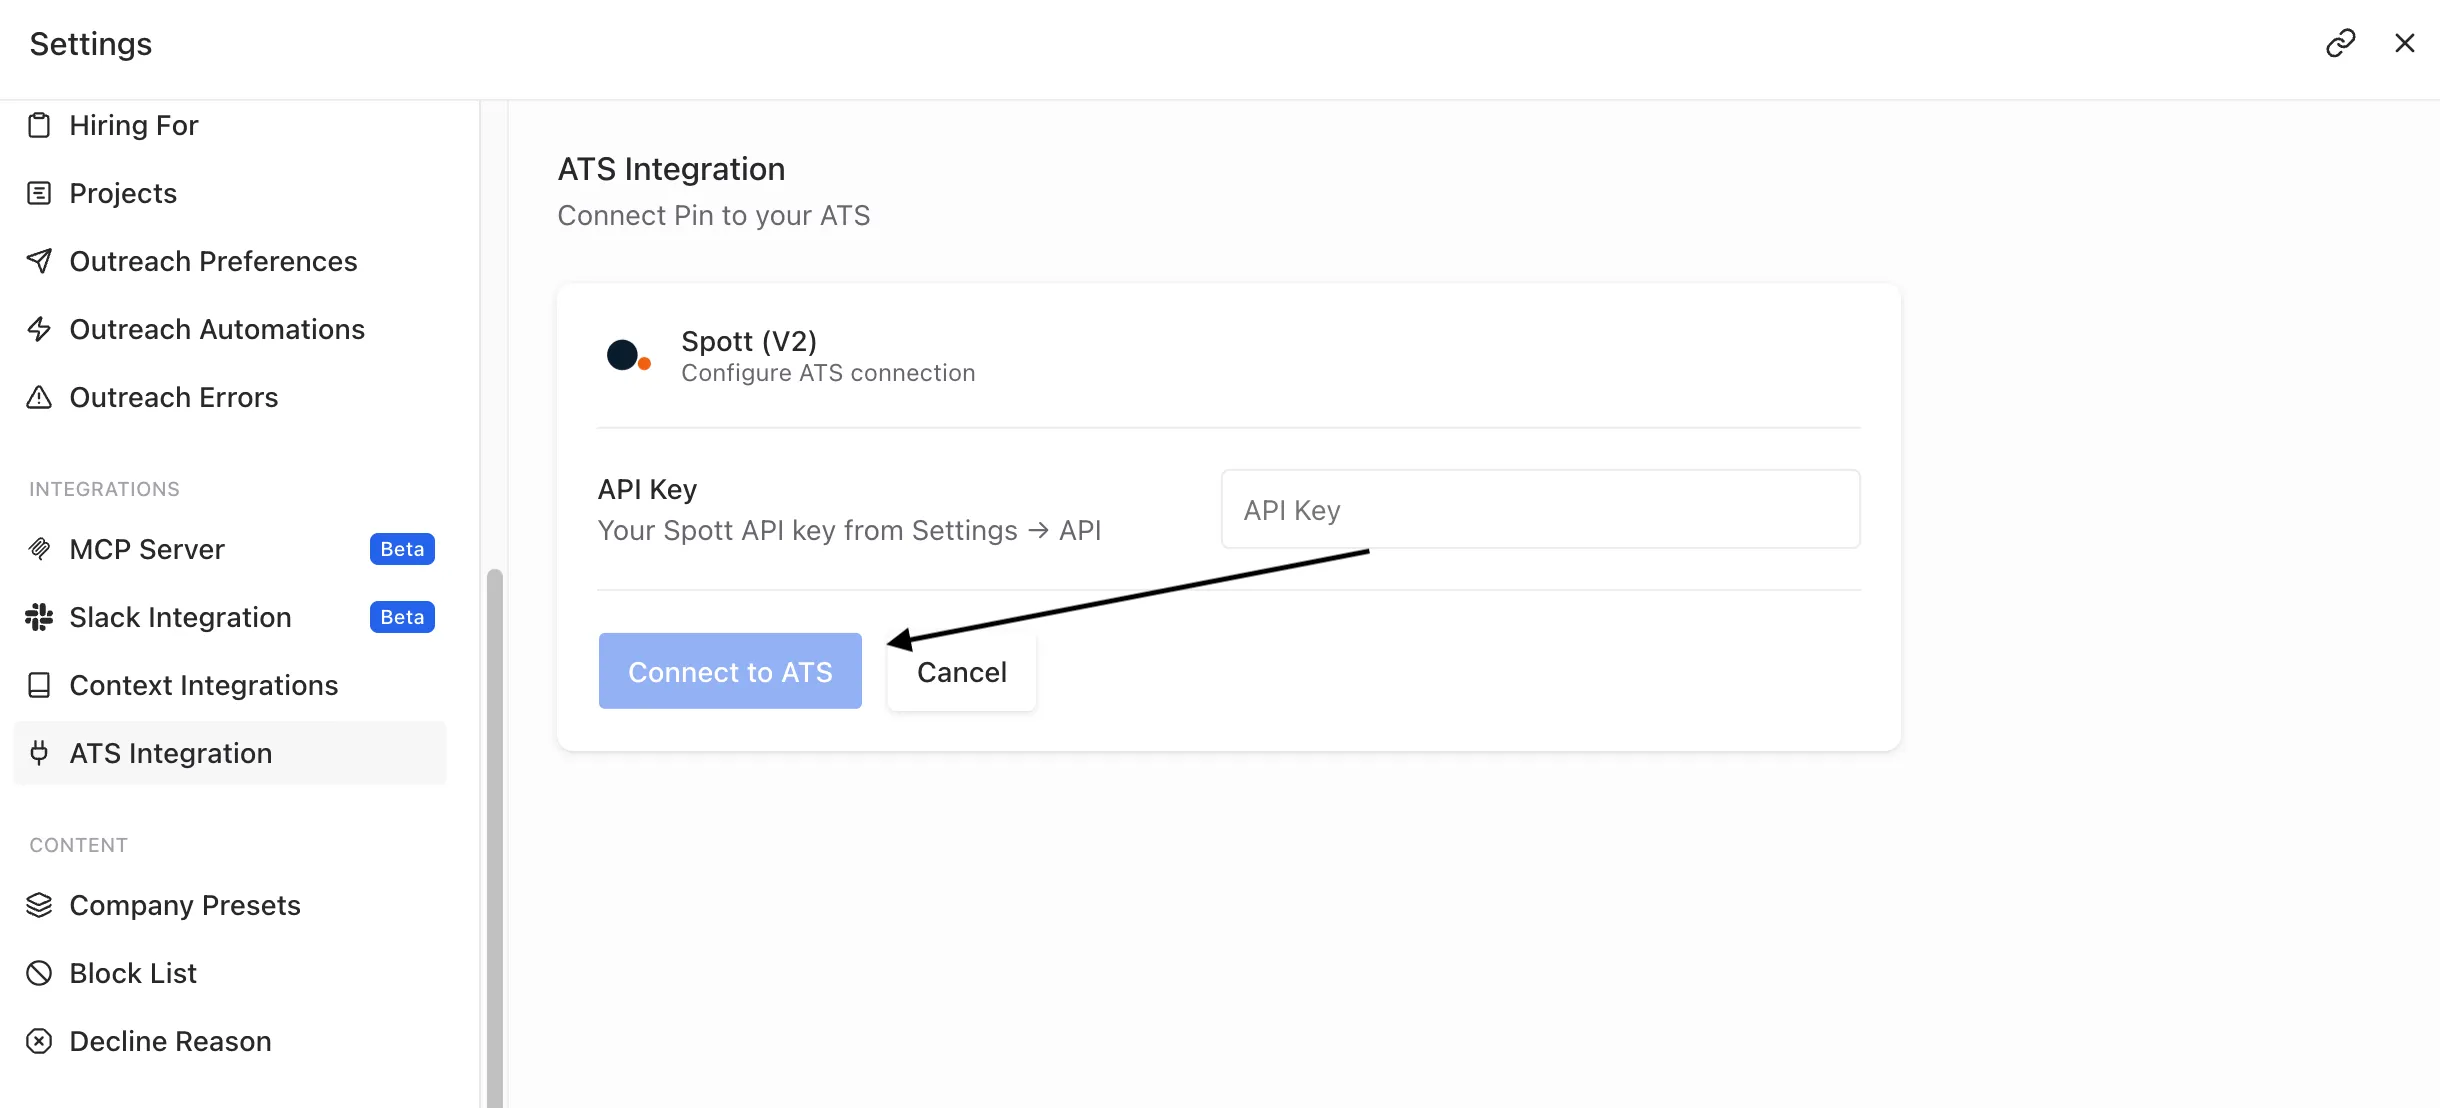
- In Pin, go to Settings → ATS Integration.
- Find Spott (V2) in the list of supported ATS platforms and select it.
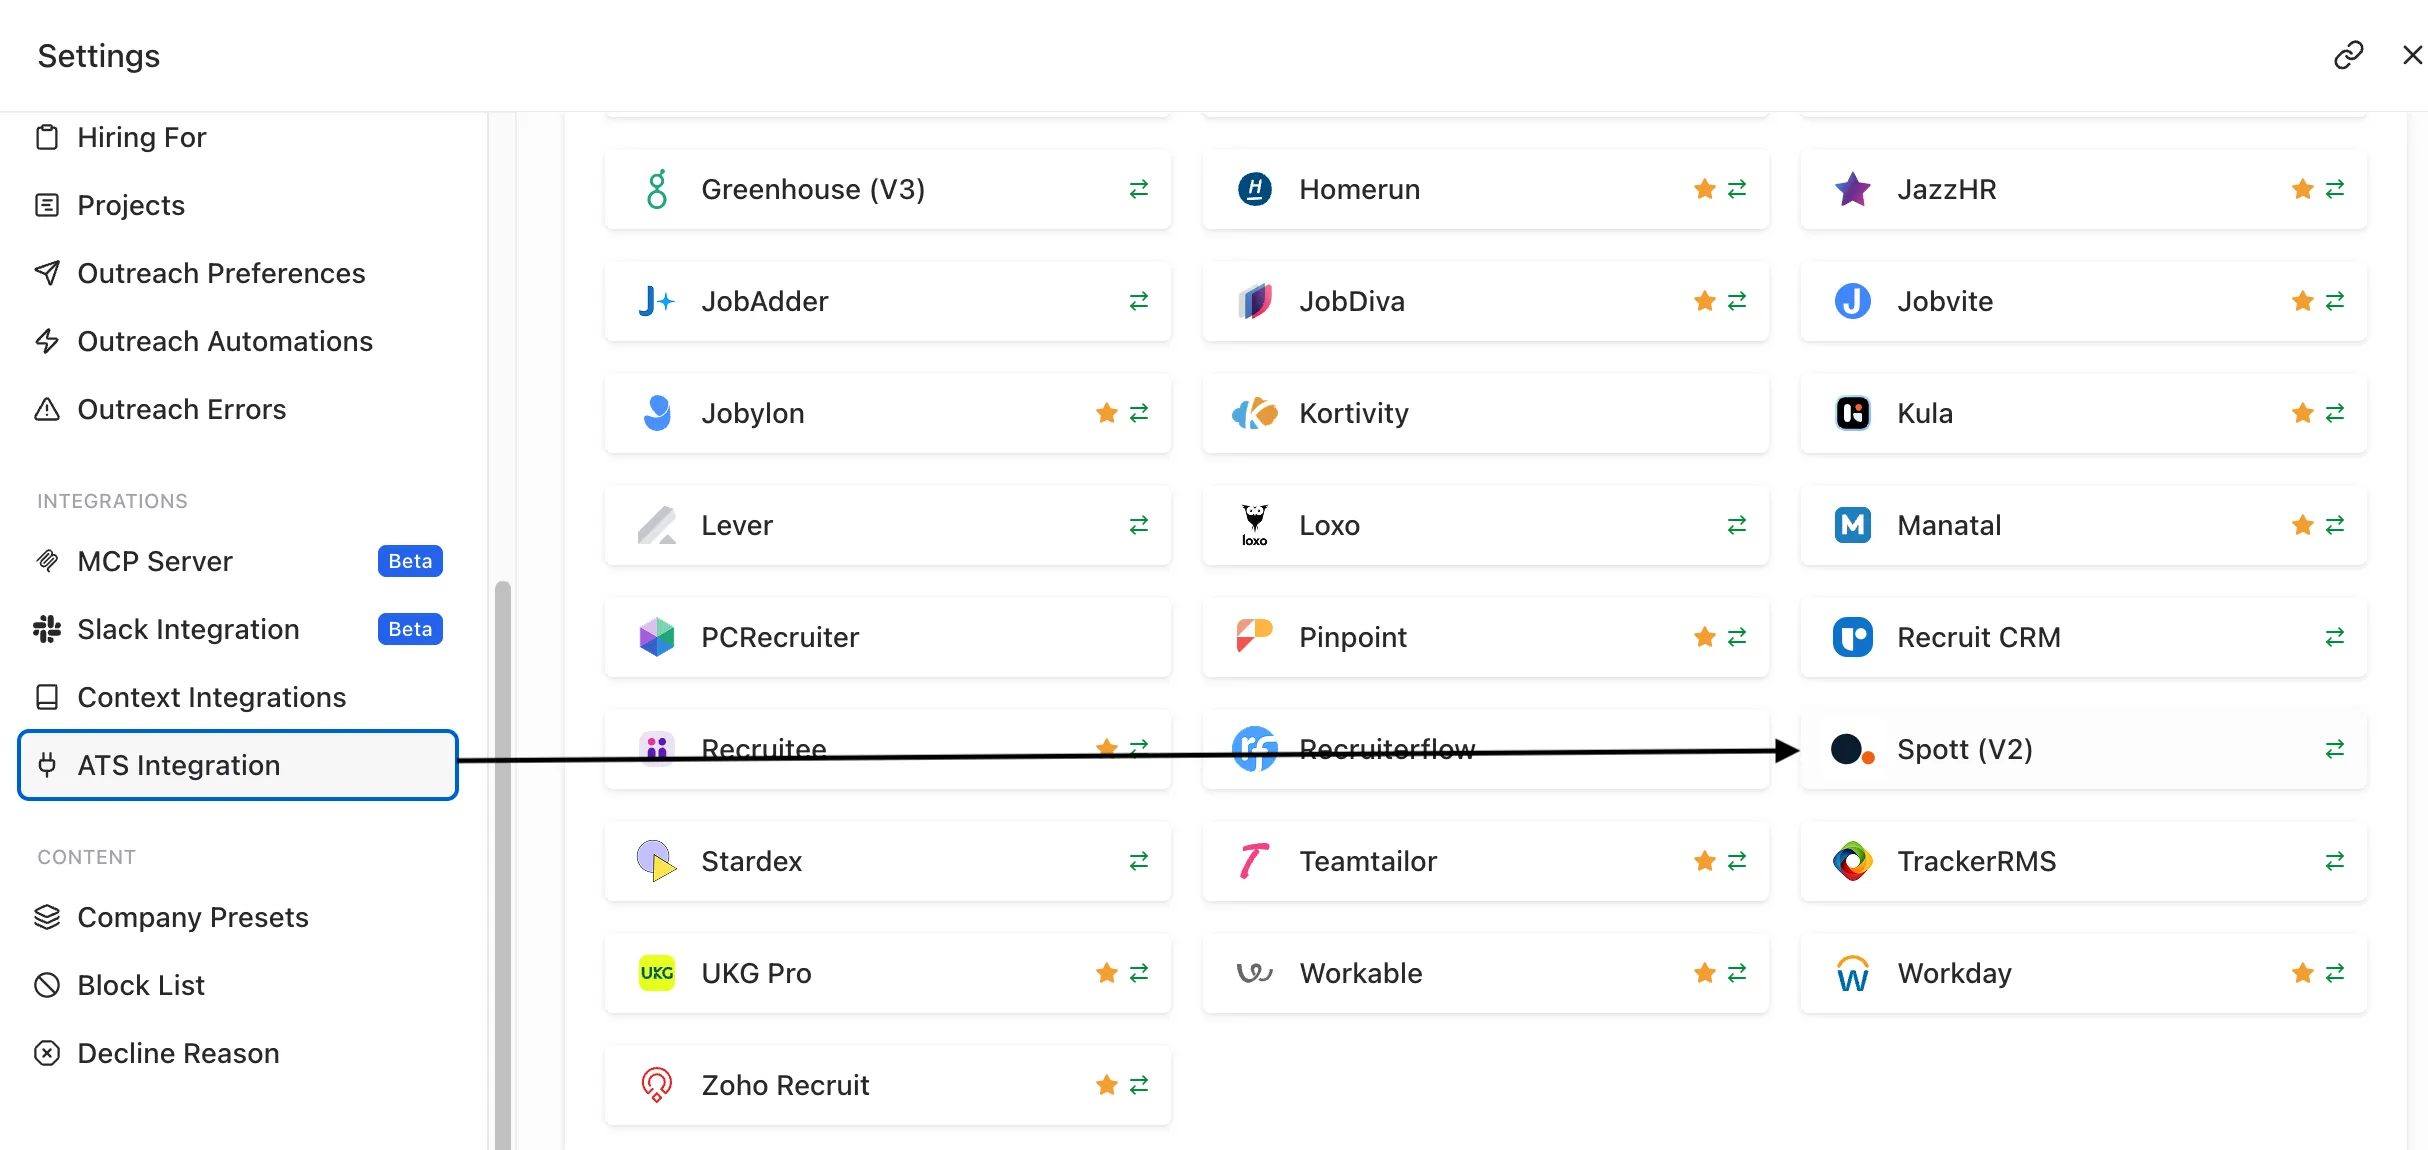
- Paste the API key you copied from Spott into the API Key field.
- Click Connect to ATS.
Configure job syncing
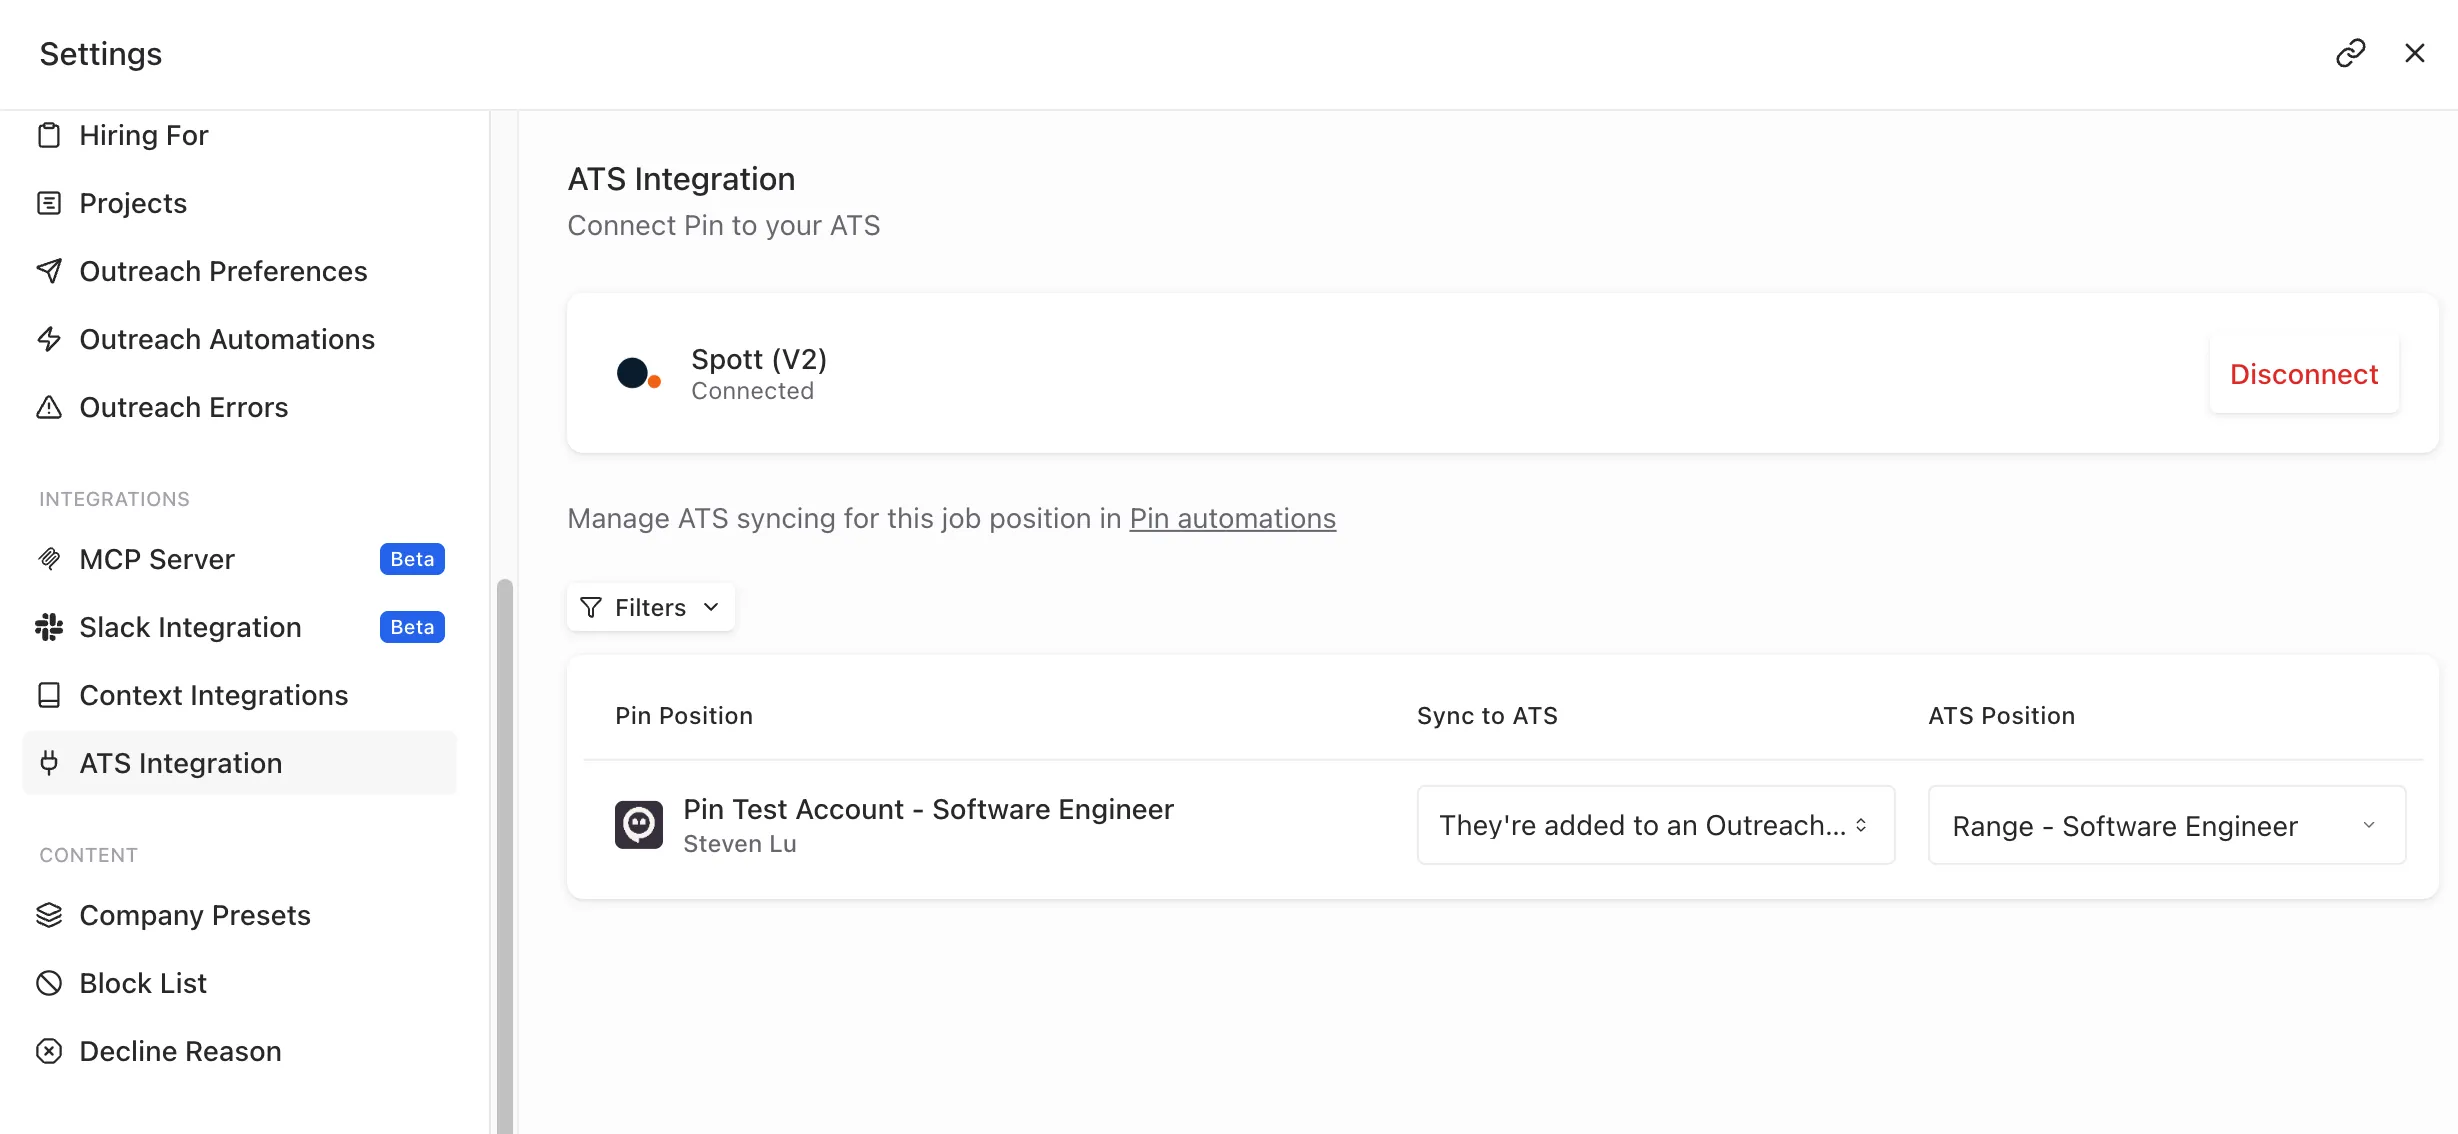
Once connected, the Spott (V2) card shows Connected, with a Disconnect option if you ever need to remove the integration.
Below that, once you set the Sync option and ATS position on each job, Pin lists each job position, alongside:
- Sync to ATS — the trigger that determines when a candidate on that position gets pushed to Spott (for example, once they're added to an outreach sequence)
- ATS Position — the matching position in Spott that candidates should sync into
Syncing candidates to Spott
To sync candidates from each job in Pin to a specific job in Spott:
- Go to Job Settings -> Position Details.
- Scroll to the ATS Integration section.
- Choose when to sync candidates by selecting one of the following triggers:
- Never
- They're added to an outreach sequence
- Contact information is found
- They receive their first message
- They reply to an email
- They reply to an email and are interested
- Select the Spott job and stage you want to sync candidates to.
Once you've selected your preferred triggers, Pin will automatically update the settings and sync candidates to the selected job in Spott based on the chosen trigger.
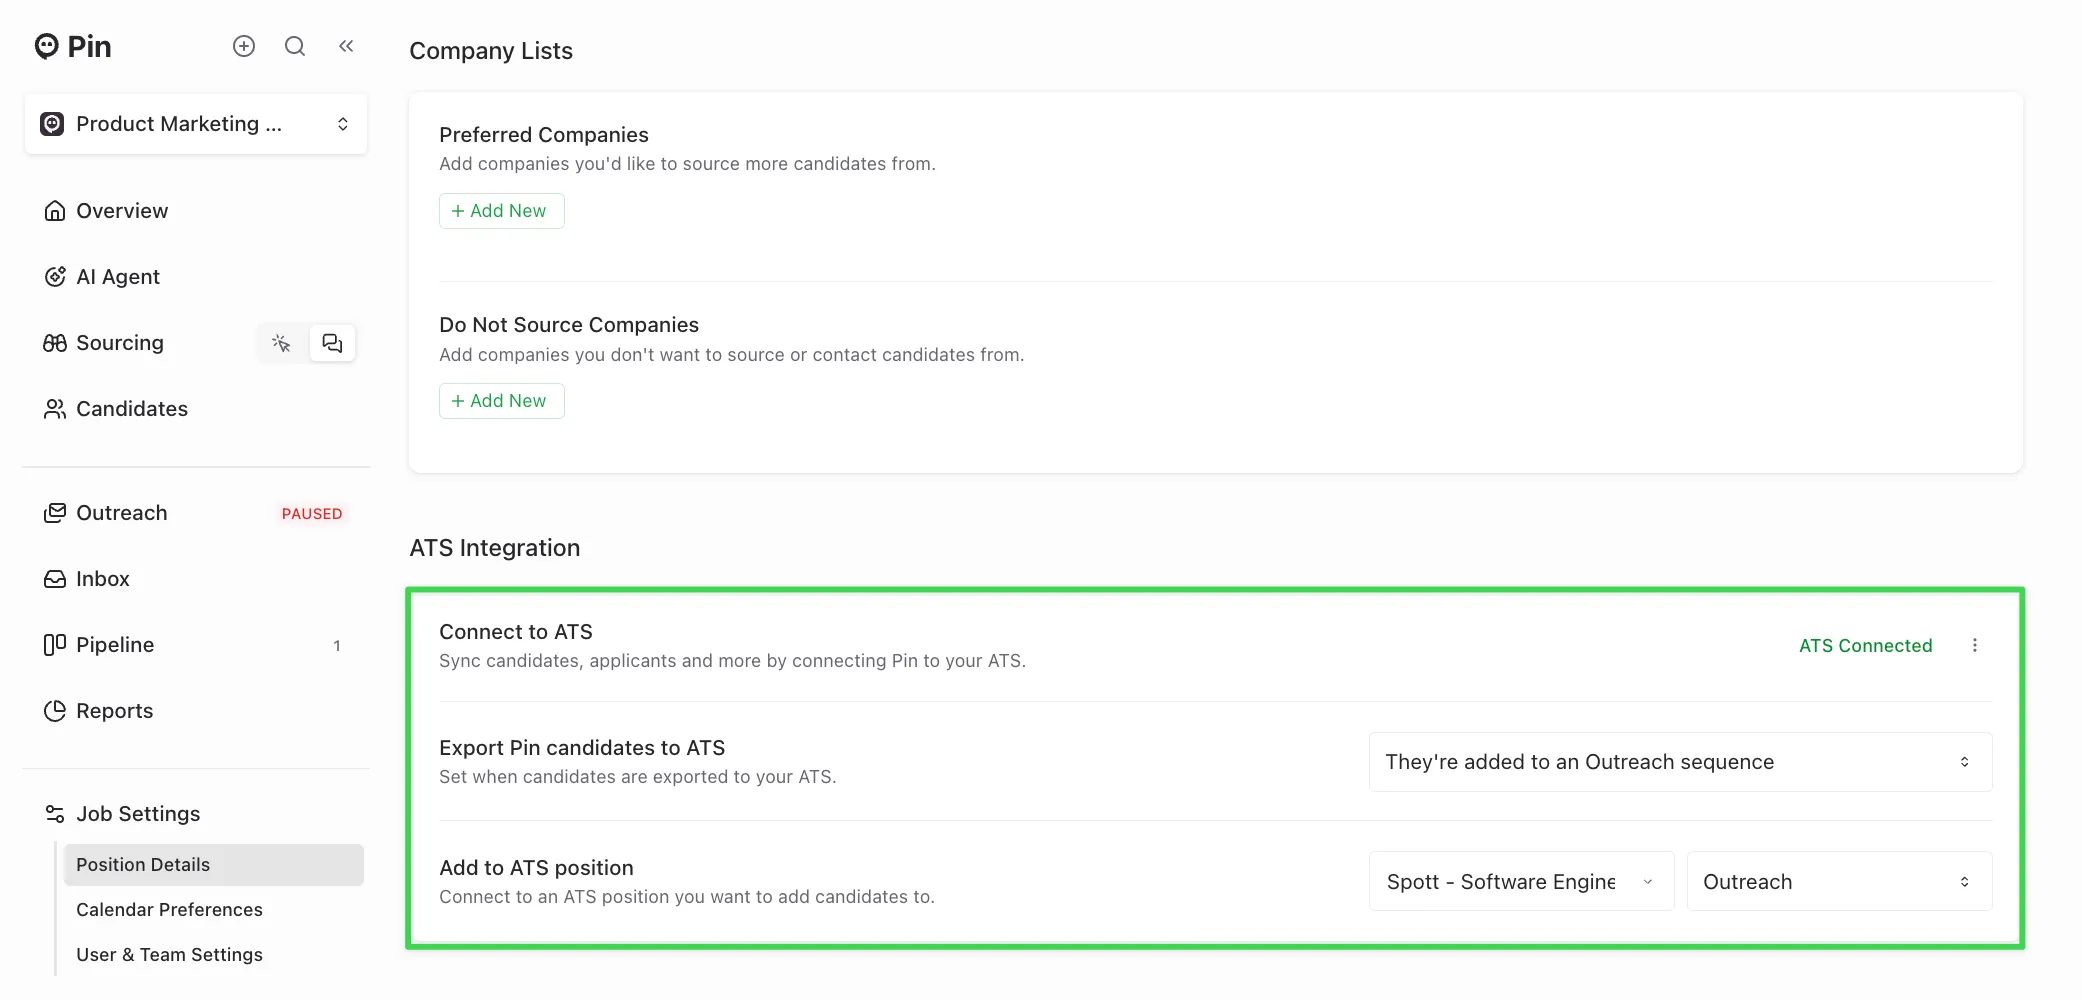
Reminder: You’ll need to set up the syncing for each job you want to send from Pin to Spott in the Position Details tab within the Job Settings. We recommend setting up the job sync before adding candidates to Outreach. This ensures candidates sync correctly to the job without issues.
If you prefer not to sync candidates to a job, you can still set up a trigger and leave the job field empty.
When candidates sync to Spott
Once the selected trigger occurs, candidates will sync to Spott within a few minutes.
For example: if you choose the trigger “Export candidates when contact information is found”, the candidate will automatically sync to Spott a few minutes after being added to Outreach.
Candidate data synced to Spott
The following candidate data will sync to Spott from Pin:
- Full name
- Phone number
- LinkedIn profile URL
- Location (city, state)
- Current and previous roles
- Education
- A Pin-generated resume PDF
- Profile photo
Important: Only contact information syncs to Spott, not message content. Pin does not push LinkedIn messages, sequence emails, or candidate replies to any connected ATS.
Manually syncing a candidate to Spott
If the candidate hasn’t synced yet:
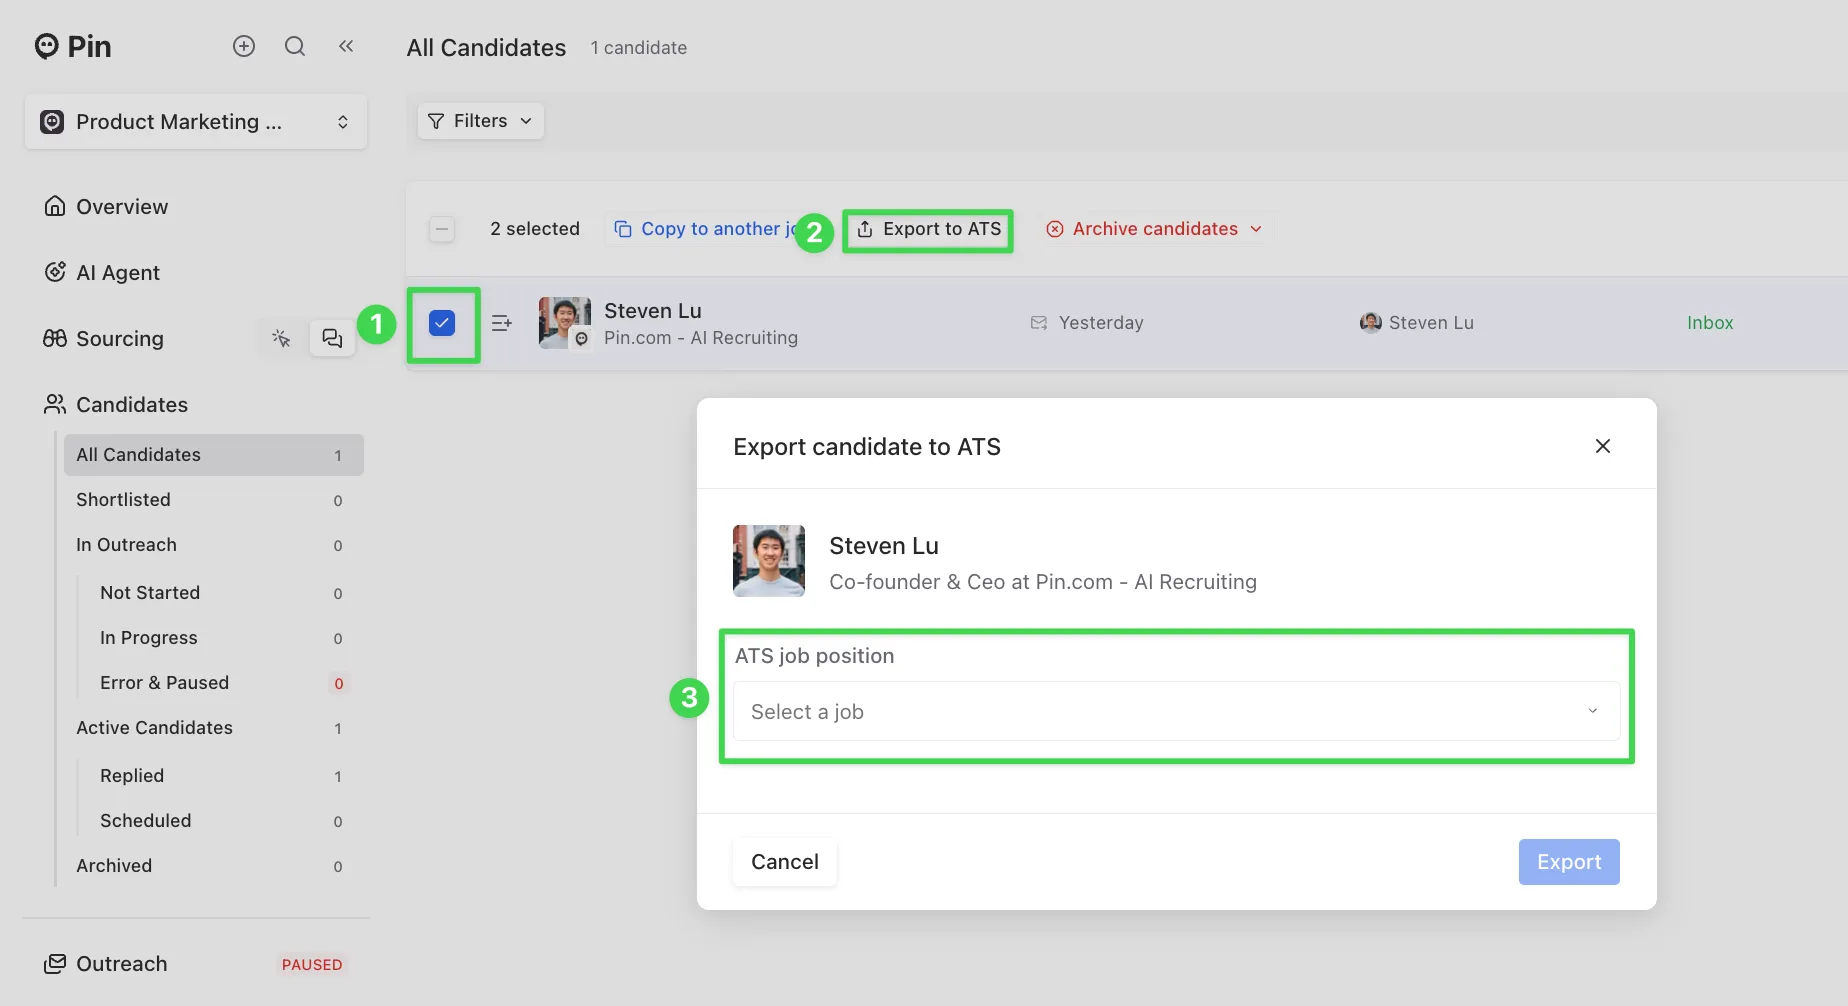
- Go to All Candidates and select the checkmark next to the candidate.
- Click “Export to ATS”.
- Choose the Spott job you want to sync the candidate to, then click “Export” to complete the sync.
- After exporting, refresh the page, and you should now see the Spott logo appear on their profile.
Important:
- Once a candidate is synced to Spott, their contact information cannot be re-synced. If some information didn’t sync, you’ll need to manually update that candidate’s profile in Spott.
- The "Export to ATS" button only works for candidates who haven’t already synced to Spott. If an integration was connected after the selected trigger, Pin won’t retroactively sync those candidates. In that case, use the "Export to ATS" button to sync them over.
Checking if a candidate synced to Spott
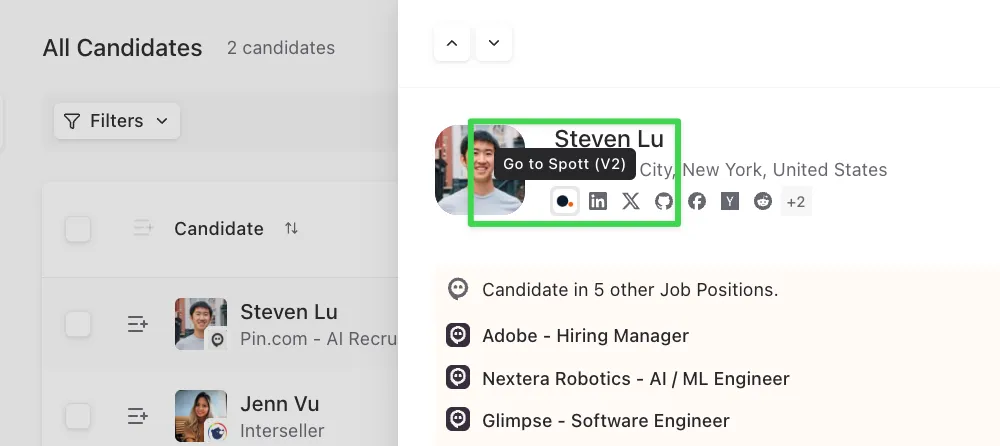
To confirm if a candidate has synced to Spott, you can open their profile in Pin. If you see the Spott logo, this means that they’ve been successfully synced. Clicking the logo will take you directly to their profile in Spott.
Disconnecting Spott from Pin
To remove the integration, go back to Settings → ATS Integration → Spott (V2) and click Disconnect. This stops the sync but doesn't delete anything already pushed to Spott.
Troubleshooting
- "Connect to ATS" isn't working / key rejected — double-check the key was copied in full with no trailing spaces, and confirm it hasn't been revoked from the Spott side (Settings → API).
- A position isn't syncing — check its Sync to ATS trigger and confirm an ATS Position is mapped; positions without a mapped ATS Position won't sync.
- Need a new key — generate a replacement in Spott (Settings → API → Create API Key) and paste it into Pin the same way; the old key can then be revoked.
Related
- Spott's API documentation — authentication, rate limits, and the full endpoint reference